

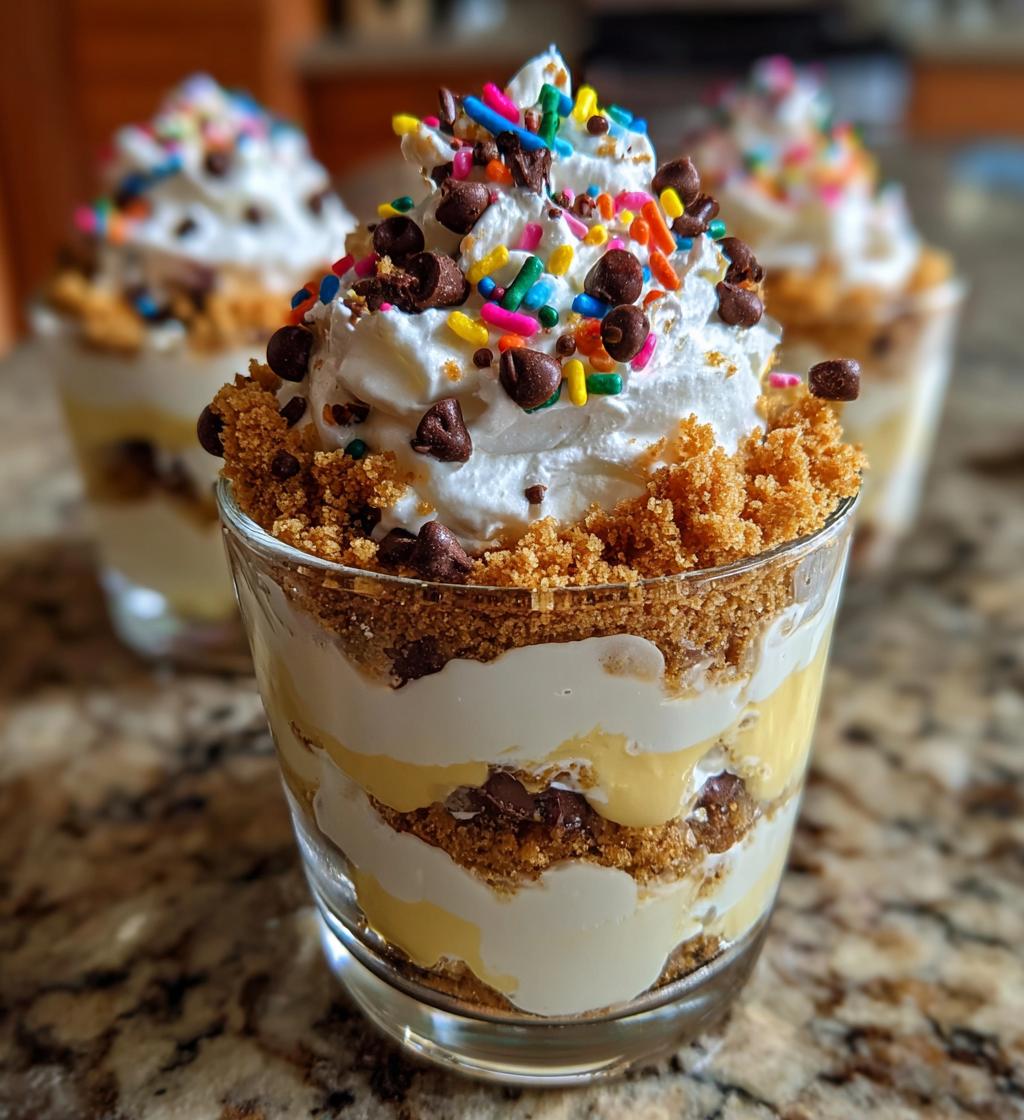
Imagine a dessert that not only pleases the palate but also delights the eyes with its vibrant layers and textures. Enter Pudding Sand Cups—a fun and whimsical treat that combines creamy vanilla pudding with crunchy graham cracker “sand.” This dessert is perfect for gatherings, kids’ parties, or simply as a sweet indulgence at home. The layers of pudding and whipped cream, along with a sprinkle of colorful toppings, create a visually appealing presentation that is sure to impress your guests. Whether you’re reminiscing about childhood desserts or looking for a simple yet elegant treat, these Pudding Sand Cups are bound to become a favorite. Let’s dive into how to recreate this delightful dessert for your next occasion!
Ingredients List
- 2 cups prepared vanilla pudding
- 1 cup finely crushed graham crackers
- 1 cup whipped cream
- 1/2 cup mini chocolate chips
- 1/4 cup colorful sprinkles
How to Prepare Pudding Sand Cups
Creating Pudding Sand Cups is a straightforward process that results in a delightful dessert perfect for any occasion. Follow these step-by-step instructions to achieve the best results.
Step 1: Prepare the Pudding
Start by preparing the vanilla pudding according to the package instructions. This typically involves mixing the pudding mix with cold milk in a bowl. Whisk vigorously for about 2 minutes until the mixture thickens. To enhance the texture, let the pudding sit for a few minutes after whisking, allowing it to set properly. This step ensures your pudding is creamy and smooth, perfect for layering in your cups.
Step 2: Prepare the Graham Cracker Mixture
In a separate bowl, combine 1 cup of finely crushed graham crackers with a few tablespoons of melted butter. Stir until the mixture resembles wet sand. The consistency should be crumbly yet hold together when pressed. If it’s too dry, add a little more melted butter; if too wet, add more crushed graham crackers. This mixture will serve as the “sand” layer in your Pudding Sand Cups.
Step 3: Layering the Cups
Now it’s time to assemble the Pudding Sand Cups. Begin by adding a layer of the graham cracker mixture to the bottom of each cup, pressing it down lightly to create a solid base. Next, spoon a layer of the prepared vanilla pudding on top of the graham cracker layer, smoothing it out with the back of the spoon. Follow this with a layer of whipped cream, spreading it evenly. Repeat these layers—graham cracker mixture, pudding, and whipped cream—until the cups are nearly full, finishing with a dollop of whipped cream on top. This layering technique not only adds texture but also creates a visually appealing presentation.
Step 4: Chill and Serve
After assembling your Pudding Sand Cups, it’s crucial to chill them in the refrigerator for at least 1 hour. This chilling time allows the layers to set and the flavors to meld together beautifully. Just before serving, you can add a sprinkle of mini chocolate chips and colorful sprinkles on top for an extra touch of fun. When ready to serve, consider using clear cups to showcase the beautiful layers of your dessert, making it as delightful to look at as it is to eat!
Why You’ll Love This Recipe
- Quick and Easy to Prepare: With minimal cooking involved, these Pudding Sand Cups can be whipped up in just 20 minutes, making them a perfect choice for last-minute desserts.
- Customizable: You can easily switch up the flavors by using different pudding varieties or adding fresh fruits to the layers, allowing for endless creativity.
- Appealing to Kids: The fun presentation and colorful toppings make these cups a hit with children, making them an excellent choice for birthday parties and family gatherings.
- Great for Entertaining: These visually stunning dessert cups are sure to impress your guests, making them suitable for any occasion, from casual get-togethers to elegant dinner parties.
- No Baking Required: Since this recipe is chilled rather than baked, it’s perfect for warm weather or when you want to avoid turning on the oven.
🍴 Top Kitchen Essentials You’ll Love




Tips for Success
To ensure your Pudding Sand Cups turn out perfectly every time, consider these helpful tips:
Ingredient Substitutions
- Pudding Variations: While vanilla pudding is a classic choice, feel free to experiment with different flavors like chocolate, butterscotch, or even cheesecake pudding for a unique twist.
- Dairy-Free Options: If you need a dairy-free version, use non-dairy milk such as almond or coconut milk to prepare the pudding and opt for a dairy-free whipped topping.
- Gluten-Free Alternatives: To make your Pudding Sand Cups gluten-free, substitute traditional graham crackers with gluten-free varieties or crushed nuts.
Preventing Layer Mixing
To maintain the distinct layers in your Pudding Sand Cups, make sure each layer is spread carefully. Use the back of a spoon to smooth out the pudding and whipped cream layers without disturbing the graham cracker base. If the layers do start to mix, chilling the dessert for longer can help them set more firmly.
Ensuring the Pudding Sets Well
Properly following the package instructions for the pudding is key to achieving a thick and creamy texture. Whisking the pudding mix with cold milk vigorously until it thickens is crucial. Let it rest for a few minutes after mixing; this allows it to set up properly before layering. Additionally, chilling the assembled cups for at least one hour (or longer if possible) helps the layers firm up, making them easier to serve and enjoy.
Presentation Tips
For a stunning presentation, consider using clear plastic or glass cups to showcase the beautiful layers of your Pudding Sand Cups. You can also garnish the top layer with additional whipped cream, a drizzle of chocolate sauce, or fresh fruit to enhance the visual appeal. Using spoons with colorful handles can add an extra touch of fun!
Variations
One of the best things about Pudding Sand Cups is their versatility. You can easily customize them to suit different tastes and occasions. Here are some fun variations to consider:
Flavor Variations or Recipe Twists
- Chocolate Pudding: Swap the vanilla pudding for chocolate pudding for a rich and decadent twist. Layer with chocolate graham crackers for added chocolate flavor.
- Fruit-Infused Pudding: Use banana or strawberry pudding for a fruity flavor. You can also add layers of fresh banana slices or strawberries between the pudding layers for a refreshing taste.
- Peanut Butter Delight: Incorporate peanut butter pudding and layer with crushed pretzels instead of graham crackers for a sweet and salty combination.
- Cookies and Cream: Use cookies and cream pudding and mix crushed Oreo cookies into the graham cracker layer for a delightful crunch.
- Matcha Green Tea: For a unique twist, try using matcha pudding and layer with crushed almond biscuits instead of graham crackers for a nutty flavor.
Dietary-Friendly Adjustments
- Vegan Version: To make your Pudding Sand Cups vegan, use plant-based milk to prepare the pudding and opt for coconut whipped cream as a topping.
- Gluten-Free Options: Substitute regular graham crackers with gluten-free graham cracker alternatives or use crushed nuts for a gluten-free base.
- Low-Sugar Choices: For a healthier option, use sugar-free pudding mixes and a low-sugar whipped topping to reduce calorie content without sacrificing flavor.
- Nut-Free Alternatives: If nut allergies are a concern, ensure that any toppings or alternative ingredients used are nut-free, such as using crushed rice cereal instead of nuts.
These variations allow you to tailor your Pudding Sand Cups to suit any palate or dietary requirement, making them a delightful treat for everyone!
Storage & Reheating Instructions
To ensure your Pudding Sand Cups stay fresh and delicious, proper storage is essential. Here’s how to store leftovers and keep them tasting great:
How to Store Leftovers
After enjoying your Pudding Sand Cups, if you have any leftovers, cover them tightly with plastic wrap or transfer them to an airtight container. This will help prevent the layers from drying out and minimize exposure to odors in your refrigerator. Stored properly, these dessert cups can last in the refrigerator for up to 3 days.
Can You Freeze Pudding Sand Cups?
While it is possible to freeze Pudding Sand Cups, it is not recommended due to the texture of the pudding and whipped cream. Freezing can cause the layers to separate and become watery upon thawing. If you do choose to freeze them, make sure to use freezer-safe containers and consume them within 1 month for the best quality. To thaw, move the cups to the refrigerator for several hours or overnight before serving.
Reheating Tips
As Pudding Sand Cups are typically served cold, there’s no need to reheat them. Just remove them from the refrigerator shortly before serving to let them sit at room temperature for a few minutes, which enhances the flavors and makes them even more enjoyable!
Nutritional Information Section
Understanding the nutritional content of your Pudding Sand Cups can help you enjoy this delightful dessert while keeping track of your dietary needs. Below are the estimated nutritional values per serving, based on typical ingredients used in the recipe:
- Calories: 250
- Fat: 10g
- Saturated Fat: 5g
- Unsaturated Fat: 3g
- Trans Fat: 0g
- Cholesterol: 20mg
- Sodium: 150mg
- Carbohydrates: 35g
- Fiber: 1g
- Sugar: 18g
- Protein: 3g
These values are estimates and can vary based on specific brands and ingredient choices. For a more tailored nutritional profile, consider adjusting the ingredients or serving sizes according to your dietary preferences.
FAQ Section
What If My Pudding Sand Cups Doesn’t Turn Out Right?
If your Pudding Sand Cups don’t turn out as expected, don’t worry! Common issues include the pudding not setting properly or layers mixing together. Ensure that you follow the pudding package instructions carefully, whisking until thickened. If layers mix, try chilling the cups longer to help the layers firm up. Remember, presentation can still be appealing even if the layers aren’t perfect!
Can I Prepare This in Advance?
Absolutely! One of the great things about Pudding Sand Cups is that they can be made a day in advance. Prepare the dessert cups and store them in the refrigerator until you’re ready to serve. Just be sure to keep them covered to maintain freshness. This makes them an excellent choice for parties and gatherings, saving you time on the day of the event!
What Ingredients Can I Swap?
There are plenty of opportunities for ingredient swaps in Pudding Sand Cups. You can use different flavors of pudding, such as chocolate or banana, to suit your taste. If you need gluten-free options, substitute graham crackers with gluten-free varieties or crushed nuts. For a dairy-free version, opt for plant-based milk and whipped cream alternatives. Feel free to get creative with toppings and layers to make this dessert your own!
Print
Pudding Sand Cups
- Total Time: 1 hour 20 minutes
- Yield: 4 servings 1x
- Diet: Vegetarian
Description
A delightful dessert featuring layers of creamy pudding and crunchy sand-like cookies, served in cups.
Ingredients
- 2 cups vanilla pudding
- 1 cup crushed graham crackers
- 1 cup whipped cream
- 1/2 cup chocolate chips
- 1/4 cup sprinkles
Instructions
- Prepare the vanilla pudding according to package instructions.
- In a separate bowl, mix crushed graham crackers with a little melted butter.
- Layer the bottom of your cups with the graham cracker mixture.
- Add a layer of vanilla pudding on top of the graham cracker layer.
- Top with whipped cream and sprinkle with chocolate chips and sprinkles.
- Repeat the layers until cups are full.
- Chill in the refrigerator for at least 1 hour before serving.
Notes
- Use any flavor of pudding you like.
- Feel free to add fresh fruit between layers.
- These can be made a day in advance.
- Prep Time: 20 minutes
- Cook Time: 0 minutes
- Category: Dessert
- Method: Chilled
- Cuisine: American
Nutrition
- Serving Size: 1 cup
- Calories: 250
- Sugar: 18g
- Sodium: 150mg
- Fat: 10g
- Saturated Fat: 5g
- Unsaturated Fat: 3g
- Trans Fat: 0g
- Carbohydrates: 35g
- Fiber: 1g
- Protein: 3g
- Cholesterol: 20mg
Keywords: Pudding Sand Cups, dessert, layered pudding, easy dessert