

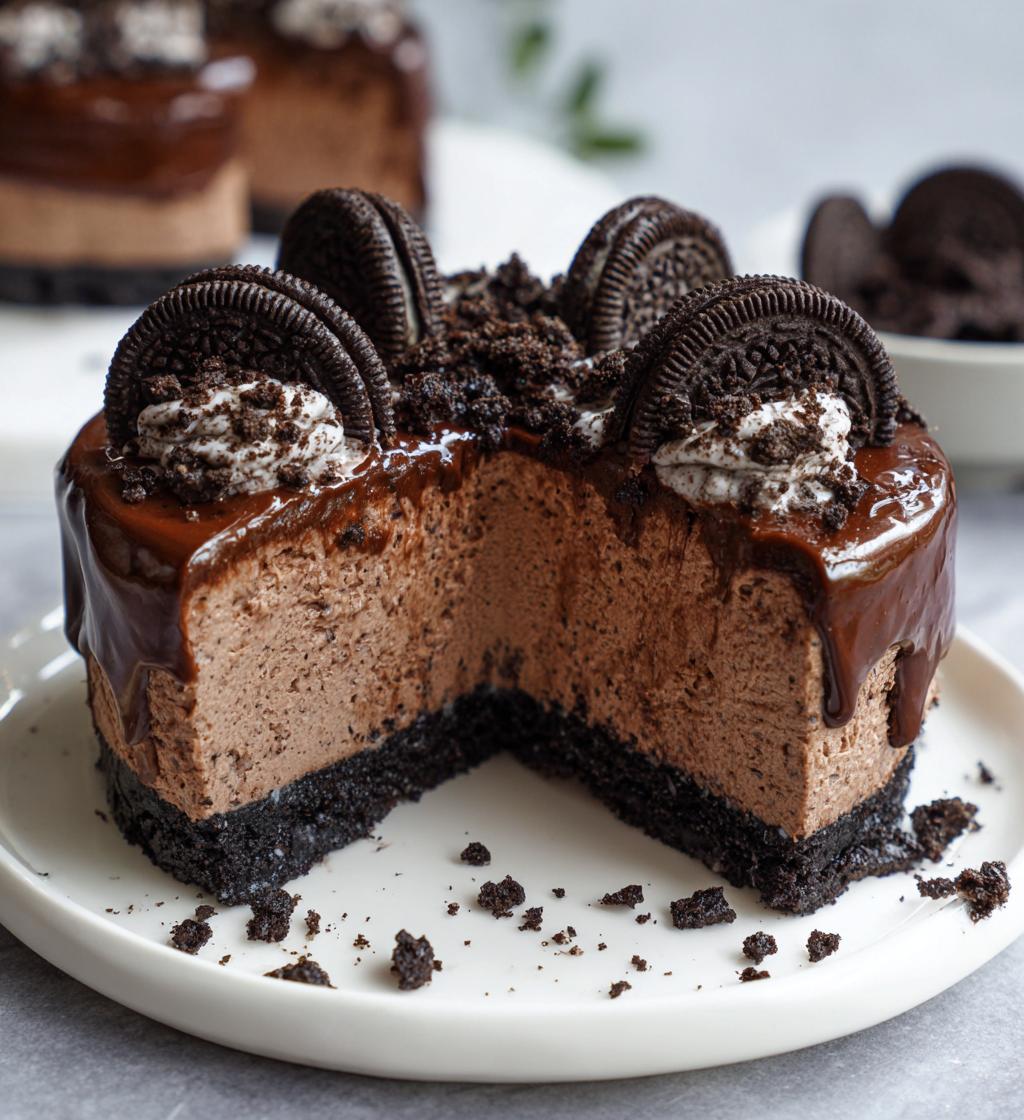
If you’re dreaming of a dessert that’s both indulgent and effortless, look no further than the No-Bake Oreo Mousse Cake. This creamy, chocolatey delight combines the beloved flavors of Oreo cookies with a silky chocolate mousse, creating a dessert that’s sure to impress at any gathering. The best part? You won’t need to turn on your oven! This no-bake recipe allows you to whip up a delicious treat in no time, making it perfect for warm days or last-minute celebrations. With just a few simple ingredients and some chilling time, you can enjoy a decadent slice of No-Bake Oreo Mousse Cake that’s sure to satisfy your sweet tooth and delight your guests. Get ready to dive into this easy-to-make dessert that brings joy with every bite!
Ingredients List
To create the delicious No-Bake Oreo Mousse Cake, you’ll need the following ingredients:
- 24 Oreo cookies, crushed: These will form the base of your cake. Use a food processor or a zip-top bag and rolling pin to crush them into fine crumbs.
- 1/2 cup butter, melted: This will bind the crushed Oreos together for a sturdy crust. Make sure to melt it completely before mixing.
- 2 cups heavy cream: This will be whipped to create a light and airy mousse. Ensure it is chilled for better whipping results.
- 1 cup powdered sugar: This adds sweetness to the mousse. Sift it if it’s lumpy for a smooth texture.
- 1 cup chocolate mousse mix: This will provide the chocolate flavor and texture. Follow package instructions for best results.
- 1/2 cup milk: This will be added to the mousse mixture to achieve the desired consistency. Whole milk is recommended for richness.
- Extra Oreos for topping: Use whole Oreos or crushed ones to garnish the cake before serving for an extra touch of flavor and visual appeal.
How to Prepare No-Bake Oreo Mousse Cake
Step 1: Prepare the Oreo Crust
To start making your No-Bake Oreo Mousse Cake, you’ll need to create the crust. In a medium bowl, combine the crushed Oreo cookies and melted butter. Use a spatula or fork to mix them together until all the cookie crumbs are evenly coated with the butter. The mixture should resemble wet sand and hold together when pressed. This will form a sturdy base for your cake.
Step 2: Press the Crust
Next, transfer the Oreo mixture into a 9-inch springform pan. Use the back of a measuring cup or your fingers to firmly press the mixture into the bottom of the pan. Make sure to create an even layer across the base, as this will support the mousse above. Once pressed down, set the crust aside while you prepare the mousse filling.
Step 3: Whip the Cream
In a large mixing bowl, pour in the chilled heavy cream. Using an electric mixer, whip the cream on medium speed until soft peaks begin to form. This usually takes about 3-5 minutes. Be careful not to over-whip, as you want a light and airy texture for your mousse. Soft peaks should hold their shape but still be smooth and creamy.
Step 4: Mix Mousse Ingredients
Once you have achieved soft peaks in the whipped cream, gently fold in the powdered sugar and chocolate mousse mix. Use a spatula to incorporate these ingredients slowly, ensuring that you maintain the airiness of the whipped cream. Be thorough to avoid any lumps, and mix until everything is well combined and smooth.
Step 5: Add Milk
Now, it’s time to add the milk to the mousse mixture. Pour in the milk gradually while continuing to fold the mixture. This will help achieve a smooth and creamy consistency. Make sure there are no lumps and that the milk is fully integrated into the mousse before proceeding to the next step.
Step 6: Assemble the Cake
With your mousse ready, carefully pour the mousse mixture over the prepared Oreo crust in the springform pan. Use a spatula to spread the mousse evenly across the crust, making sure it reaches the edges. Smooth the top as needed to create an appealing surface for the final presentation.
Step 7: Chill the Cake
To allow the mousse to set properly, cover the springform pan with plastic wrap or a lid and place it in the refrigerator. Chill the cake for at least 4 hours, or until it is completely set. This chilling time is crucial for the mousse to firm up, ensuring that your No-Bake Oreo Mousse Cake holds its shape when served.
Step 8: Add Toppings
Once the cake has set, it’s time to add the finishing touches. Carefully remove the sides of the springform pan. You can garnish the top with extra whole Oreos or crushed Oreo pieces for a delightful presentation. This not only adds visual appeal but also enhances the Oreo flavor in every slice. Your No-Bake Oreo Mousse Cake is now ready to be served!
Tips for Success
To ensure your No-Bake Oreo Mousse Cake turns out perfectly, follow these helpful tips:
Use the Right Equipment
Having the right tools can make a significant difference in your dessert preparation. A high-quality electric mixer is essential for whipping the cream to the right consistency. Additionally, a 9-inch springform pan is ideal for this recipe, as it allows for easy removal of the cake once set. If you don’t have a springform pan, a regular cake pan will work, but you may need to serve the cake directly from it.
Chill Ingredients for Best Results
To achieve fluffy whipped cream, ensure that your heavy cream is well-chilled before whipping. This helps it whip up better and faster, resulting in a light and airy texture for your mousse. You can even chill your mixing bowl and beaters for a few minutes in the freezer before starting for an extra boost.
Don’t Over-Whip the Cream
When whipping the heavy cream, keep an eye on the texture. Stop whipping as soon as soft peaks form; over-whipping can lead to a grainy texture and may cause the cream to turn into butter. The whipped cream should be smooth and hold its shape without being stiff.
Be Gentle When Folding Ingredients
When combining the whipped cream with the powdered sugar and chocolate mousse mix, use a gentle folding motion. This technique helps retain the air bubbles in the whipped cream, which is essential for the mousse’s light texture. Avoid stirring vigorously, as this can deflate the mixture and lead to a denser mousse.
Allow Enough Chilling Time
Patience is key! Ensure you allow the No-Bake Oreo Mousse Cake to chill for at least 4 hours, or preferably overnight, to set properly. This time allows the mousse to firm up, making it easier to slice and serve. Rushing this step can result in a mousse that doesn’t hold its shape.
Storage Tips
If you have leftovers, store the No-Bake Oreo Mousse Cake in the refrigerator. Cover it with plastic wrap or a lid to keep it fresh. It’s best enjoyed within a few days after making it to experience the optimal texture and flavor.
🍴 Top Kitchen Essentials You’ll Love




Nutritional Information
Here are the typical nutritional values for a slice of No-Bake Oreo Mousse Cake. Please note that these values are estimates and may vary based on specific ingredients used and portion sizes:
- Calories: 350
- Fat: 25g
- Saturated Fat: 15g
- Unsaturated Fat: 5g
- Trans Fat: 0g
- Cholesterol: 50mg
- Sodium: 200mg
- Carbohydrates: 30g
- Fiber: 1g
- Sugar: 25g
- Protein: 3g
FAQ Section
What If My No-Bake Oreo Mousse Cake Doesn’t Turn Out Right?
If your No-Bake Oreo Mousse Cake doesn’t set properly, it could be due to insufficient chilling time or improper mixing of ingredients. Make sure you allow the cake to chill for at least 4 hours, or preferably overnight, to ensure it firms up. If it’s still too soft, you can try placing it in the freezer for a short period to help it set further. If the whipped cream was over-whipped, it might affect the texture of the mousse, leading to a less desirable outcome. Always be gentle when folding in ingredients to maintain the airiness of the mousse.
Can I Prepare This in Advance?
Absolutely! The No-Bake Oreo Mousse Cake is perfect for making in advance. You can prepare it a day or two ahead of time and let it chill in the refrigerator until you’re ready to serve it. Just remember to keep it covered with plastic wrap or a lid to maintain freshness. This makes it an excellent option for parties, gatherings, or any occasion where you want to save time and effort.
What Ingredients Can I Swap?
If you want to customize your No-Bake Oreo Mousse Cake, there are several ingredients you can swap. For a gluten-free version, use gluten-free Oreo cookies. If you’re looking for a dairy-free option, consider using coconut cream instead of heavy cream and a non-dairy milk alternative. You can also experiment with different flavored mousse mixes, like vanilla or strawberry, to create a unique version of the cake. Just keep in mind that swapping ingredients may alter the final flavor and texture.
Why You’ll Love This Recipe
- Quick and Easy: The No-Bake Oreo Mousse Cake is simple to prepare, requiring no baking and minimal effort, making it perfect for quick desserts.
- Decadent Flavor: Combining the rich taste of chocolate mousse with the beloved flavor of Oreo cookies creates a dessert that is indulgent and satisfying.
- Perfect for Any Occasion: Whether it’s a birthday, holiday, or just a casual gathering, this cake is sure to impress your guests and is suitable for any celebration.
- Make-Ahead Friendly: You can prepare this cake in advance, allowing you to enjoy your time with guests without the stress of last-minute dessert preparations.
- Customizable: The recipe allows for ingredient substitutions, so you can easily adapt it to suit dietary preferences or experiment with different flavors.
- Kid-Friendly: With its fun and familiar Oreo flavor, this dessert is a hit with kids and adults alike, making it a crowd-pleaser at any gathering.

No-Bake Oreo Mousse Cake
- Total Time: 4 hours 30 minutes
- Yield: 8 servings 1x
- Diet: Vegetarian
Description
A creamy and delicious no-bake dessert made with Oreo cookies and chocolate mousse.
Ingredients
- 24 Oreo cookies, crushed
- 1/2 cup butter, melted
- 2 cups heavy cream
- 1 cup powdered sugar
- 1 cup chocolate mousse mix
- 1/2 cup milk
- Extra Oreos for topping
Instructions
- Combine crushed Oreos and melted butter in a bowl.
- Press the mixture into the bottom of a springform pan.
- In a separate bowl, whip heavy cream until soft peaks form.
- Add powdered sugar and chocolate mousse mix to the whipped cream.
- Slowly add milk and mix until well combined.
- Pour the mousse over the Oreo crust and spread evenly.
- Chill in the refrigerator for at least 4 hours or until set.
- Top with extra Oreos before serving.
Notes
- Ensure the mousse is fully set before serving.
- You can use a different flavor of cookies if desired.
- Store leftovers in the refrigerator.
- Prep Time: 30 minutes
- Cook Time: 0 minutes
- Category: Dessert
- Method: No-Bake
- Cuisine: American
Nutrition
- Serving Size: 1 slice
- Calories: 350
- Sugar: 25g
- Sodium: 200mg
- Fat: 25g
- Saturated Fat: 15g
- Unsaturated Fat: 5g
- Trans Fat: 0g
- Carbohydrates: 30g
- Fiber: 1g
- Protein: 3g
- Cholesterol: 50mg
Keywords: No-Bake Oreo Mousse Cake, Oreo dessert, chocolate mousse, no-bake cake