

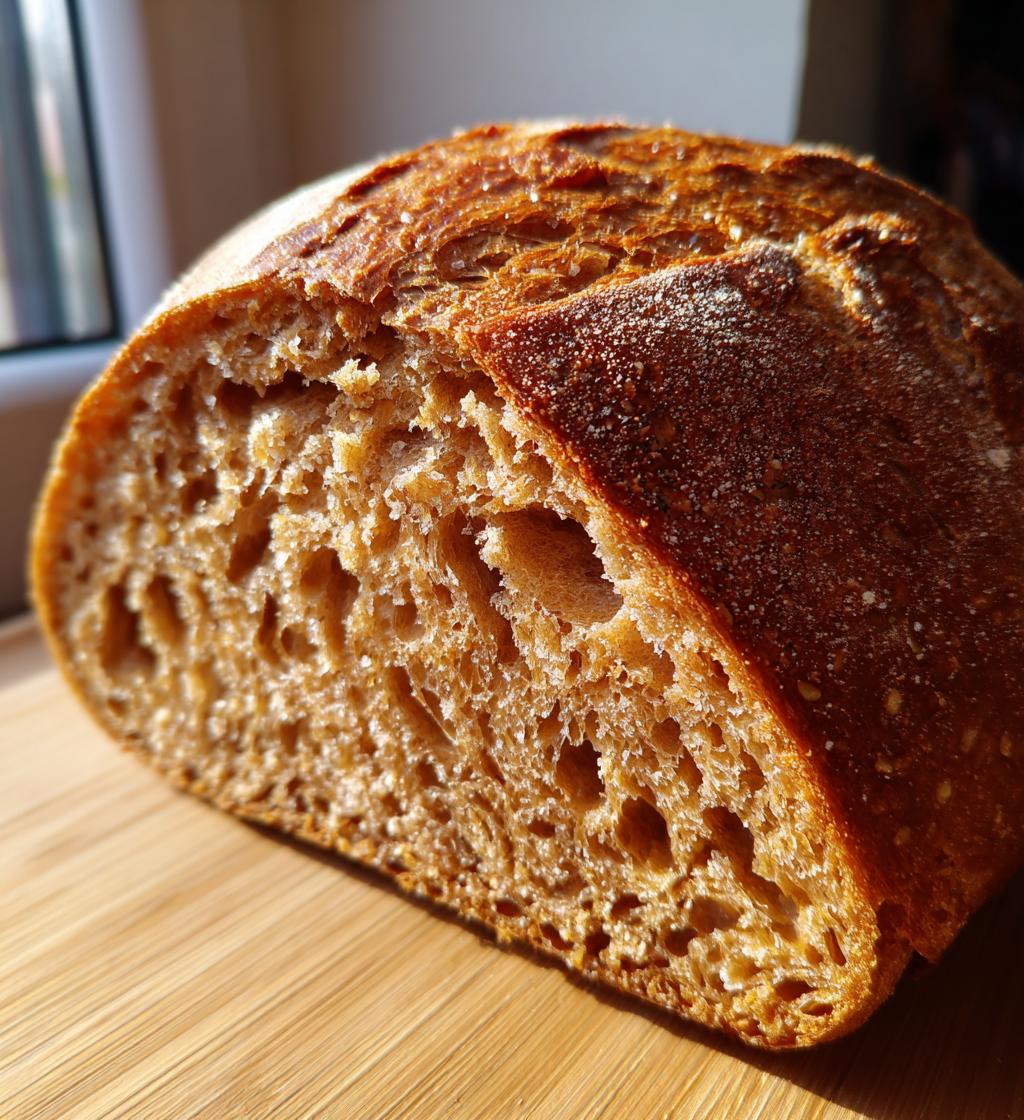
There’s something incredibly comforting about the smell of freshly baked bread wafting through your home. As a child, I fondly remember weekends spent with my grandmother, kneading dough and waiting eagerly for the bread to rise. One of our favorite recipes was Honey Wheat Bread, a delightful blend of wholesome whole wheat flour and the natural sweetness of honey. This bread not only nourishes the body but also warms the heart, making it a staple in our family gatherings. The combination of nutty flavors and a hint of sweetness makes Honey Wheat Bread a versatile choice, perfect for breakfast, lunch, or dinner. Whether toasted and slathered with butter or used for hearty sandwiches, this bread never fails to impress. Join me on this journey to create your own batch of Honey Wheat Bread, and discover how easy and rewarding baking can be!

Ingredients for Honey Wheat Bread
To create your own delightful Honey Wheat Bread, gather the following ingredients. Each component plays a vital role in achieving the perfect texture and flavor:
- 2 cups whole wheat flour: This provides the bread with a hearty, nutty flavor and is packed with nutrients.
- 1 cup all-purpose flour: Aids in creating a light texture while still maintaining the wholesome qualities of whole wheat.
- 1/4 cup honey: Adds natural sweetness and enhances the bread’s flavor profile. Feel free to adjust the amount for your desired sweetness.
- 1 1/2 teaspoons salt: Enhances the overall flavor of the bread.
- 2 teaspoons active dry yeast: Essential for the rising process; make sure it’s fresh for the best results.
- 1 cup warm water: Activates the yeast; ensure the water is warm but not hot (around 110°F or 43°C).
- 2 tablespoons olive oil: Adds moisture and a slight richness to the bread.
Before you begin, ensure that your ingredients are at room temperature, especially the honey and olive oil, for easier mixing. Measure accurately and have everything ready to go for a smooth baking experience.
How to Prepare Honey Wheat Bread
Preparing Honey Wheat Bread is a delightful process that fills your kitchen with warm, inviting aromas. Follow these step-by-step instructions to create a delicious loaf that you and your family will love.
Step-by-Step Instructions
Step 1: Activate the Yeast
In a mixing bowl, combine 1 cup of warm water (around 110°F or 43°C) with 2 teaspoons of active dry yeast. Allow the mixture to sit for about 5 minutes, or until it becomes frothy. This indicates that the yeast is alive and ready to help your bread rise.
Step 2: Mix Wet Ingredients
Once the yeast is activated, add 1/4 cup of honey and 2 tablespoons of olive oil to the yeast mixture. Stir gently until the honey is dissolved and the mixture is well combined.
Step 3: Prepare the Dry Ingredients
In a separate large bowl, whisk together 2 cups of whole wheat flour, 1 cup of all-purpose flour, and 1 1/2 teaspoons of salt. Mixing the dry ingredients separately helps to ensure an even distribution of the salt and flour before combining with the wet ingredients.
Step 4: Combine Wet and Dry Ingredients
Gradually add the flour mixture to the wet ingredients, stirring continuously with a wooden spoon or spatula until a shaggy dough forms. Ensure all the flour is incorporated, and the dough starts to pull away from the sides of the bowl.
Step 5: Knead the Dough
Transfer the dough onto a floured surface. Knead the dough for approximately 10 minutes, adding more flour as needed to prevent sticking. The dough should become smooth and elastic. To check if it’s ready, perform the windowpane test by stretching a small piece of dough; it should stretch thin without tearing.
Step 6: First Rise
Place the kneaded dough into a greased bowl, turning it to coat all sides with oil. Cover the bowl with a clean kitchen towel or plastic wrap. Allow the dough to rise in a warm environment for about 1 hour, or until it doubles in size. A warm, draft-free area is ideal for this step.
Step 7: Shape the Loaf
After the dough has risen, gently punch it down to release the air. Transfer it to a lightly floured surface and shape it into a loaf. You can do this by flattening the dough slightly, then rolling it tightly into a cylinder.
Step 8: Second Rise
Place the shaped loaf into a greased loaf pan. Cover it again and let it rise for an additional 30 minutes. During this time, preheat your oven to 350°F (175°C) so that it’s hot and ready for baking.
Step 9: Bake the Bread
Once the loaf has risen, bake it in the preheated oven for 30-35 minutes. The bread should turn a golden brown and sound hollow when tapped on the bottom. If you have a kitchen thermometer, the internal temperature should reach around 190°F (88°C).
Step 10: Cool and Slice
After baking, remove the bread from the oven and let it cool in the pan for about 10 minutes. Then, transfer it to a wire rack to cool completely before slicing. This helps maintain the bread’s texture and prevents it from becoming gummy.
Why You’ll Love This Honey Wheat Bread
- Delicious Flavor: The combination of whole wheat flour and honey creates a wholesome, slightly sweet flavor that pairs perfectly with both savory and sweet toppings.
- Health Benefits: Packed with nutrients, fiber, and natural sweetness, Honey Wheat Bread is a healthier alternative to white bread, making it a great choice for sandwiches or as a side.
- Easy to Make: With simple ingredients and straightforward steps, this recipe is perfect for beginner bakers and will impress family and friends alike.
- Versatile Usage: Whether toasted for breakfast, used for sandwiches, or enjoyed fresh out of the oven, this bread is incredibly versatile and can be adapted for various meals.
- Homemade Goodness: There’s nothing quite like the satisfaction of baking your own bread, filling your home with comforting aromas, and creating something truly special.
🍴 Top Kitchen Essentials You’ll Love




Tips for Success with Honey Wheat Bread
To ensure your Honey Wheat Bread turns out perfectly every time, follow these practical tips:
Focus on Accurate Measurements
Precision is key in baking. Use a kitchen scale for the most accurate measurements, especially for your flours. This helps achieve the right dough consistency.
Perfect Your Kneading Technique
Kneading is essential for developing gluten, which gives the bread its structure. Use the heel of your hand to push the dough away from you, then fold it back over itself. Repeat this motion for about 10 minutes until the dough becomes smooth and elastic. If it sticks, sprinkle a little more flour as needed.
Control the Rising Environment
For optimal rising, find a warm, draft-free space. You can create a warm environment by preheating your oven to its lowest setting for a few minutes, then turning it off and placing the dough inside, covered with a towel. This ensures the dough rises well and doubles in size.
Check for Doneness
To determine if your bread is fully baked, tap the bottom of the loaf; it should sound hollow. Additionally, use a kitchen thermometer to check that the internal temperature reaches around 190°F (88°C).
Let It Cool Properly
Cooling the bread on a wire rack prevents moisture build-up and maintains its texture. Avoid slicing until it is completely cool to prevent a gummy crumb.
Nutritional Information for Honey Wheat Bread
When enjoying a slice of Honey Wheat Bread, you can feel good about the nutritional benefits it offers. Here’s an estimated breakdown of the nutrition per slice:
- Calories: 120
- Fat: 2g
- Saturated Fat: 0g
- Unsaturated Fat: 1g
- Trans Fat: 0g
- Cholesterol: 0mg
- Sodium: 150mg
- Carbohydrates: 22g
- Fiber: 3g
- Protein: 4g
- Sugar: 3g
These values are approximate and can vary based on the specific ingredients used. Enjoy this wholesome bread as a nutritious addition to your meals!
FAQs about Honey Wheat Bread
What If My Honey Wheat Bread Doesn’t Turn Out Right?
If your Honey Wheat Bread doesn’t rise or has a dense texture, the issue may lie with the yeast. Ensure that your yeast is fresh and activated properly before mixing. Additionally, make sure you’re measuring your ingredients accurately. If the bread is too dry, consider adding a little more warm water; if it’s too wet, add a small amount of flour until you achieve the right consistency.
Can I Prepare This Honey Wheat Bread in Advance?
Yes, you can prepare Honey Wheat Bread in advance! After shaping the loaf, you can cover it tightly and refrigerate it for up to 24 hours before the second rise. When you’re ready to bake, remove it from the fridge and allow it to come to room temperature and rise for about 30 minutes before baking. This helps enhance the flavor and texture of the bread.
What Ingredients Can I Swap in Honey Wheat Bread?
If you’re looking to make adjustments, consider swapping honey with maple syrup for a different flavor profile. You can also substitute whole wheat flour with spelt flour or a gluten-free blend for dietary needs. Just keep in mind that these substitutions may affect the bread’s texture and flavor, so it may require some experimentation to find the perfect balance.
Storage & Reheating Instructions
To keep your Honey Wheat Bread fresh, store it in an airtight container at room temperature for up to 3 days. If you want to extend its shelf life, consider freezing it. Wrap the cooled loaf tightly in plastic wrap and then place it in a freezer-safe bag. This method will help prevent freezer burn and keep the bread fresh for up to 3 months.
When you’re ready to enjoy your frozen Honey Wheat Bread, simply remove it from the freezer and let it thaw at room temperature for a few hours. For a warm and soft texture, preheat your oven to 350°F (175°C) and bake the thawed loaf for about 10-15 minutes. This will revive the bread’s crust and make it delightful to eat again.
Call to Action
We hope you enjoy making and savoring your own Honey Wheat Bread! If you try this recipe, please leave a comment below and share your thoughts. We would love to hear about your baking experience and any variations you made. Don’t forget to rate the recipe and share your delicious creation on social media using #HoneyWheatBread. Happy baking!
Print
Honey Wheat Bread
- Total Time: 1 hour 50 minutes
- Yield: 1 loaf 1x
- Diet: Vegetarian
Description
A wholesome and slightly sweet bread made with honey and whole wheat flour.
Ingredients
- 2 cups whole wheat flour
- 1 cup all-purpose flour
- 1/4 cup honey
- 1 1/2 teaspoons salt
- 2 teaspoons active dry yeast
- 1 cup warm water
- 2 tablespoons olive oil
Instructions
- In a bowl, combine warm water and yeast. Let it sit for 5 minutes.
- Add honey and olive oil to the yeast mixture.
- In a separate bowl, mix whole wheat flour, all-purpose flour, and salt.
- Gradually add the flour mixture to the wet ingredients and stir until a dough forms.
- Knead the dough on a floured surface for about 10 minutes.
- Place the dough in a greased bowl and cover it. Let it rise for 1 hour.
- Punch down the dough and shape it into a loaf.
- Place the loaf in a greased pan and let it rise for another 30 minutes.
- Bake in a preheated oven at 350°F (175°C) for 30-35 minutes.
- Cool before slicing.
🍴 Top Kitchen Essentials You’ll Love
Notes
- Store bread in an airtight container.
- Can substitute honey with maple syrup for a different flavor.
- For added texture, mix in seeds or nuts.
- Prep Time: 15 minutes
- Cook Time: 35 minutes
- Category: Baking
- Method: Baking
- Cuisine: American
Nutrition
- Serving Size: 1 slice
- Calories: 120
- Sugar: 3g
- Sodium: 150mg
- Fat: 2g
- Saturated Fat: 0g
- Unsaturated Fat: 1g
- Trans Fat: 0g
- Carbohydrates: 22g
- Fiber: 3g
- Protein: 4g
- Cholesterol: 0mg
Keywords: Honey Wheat Bread, Whole Wheat Bread, Homemade Bread