

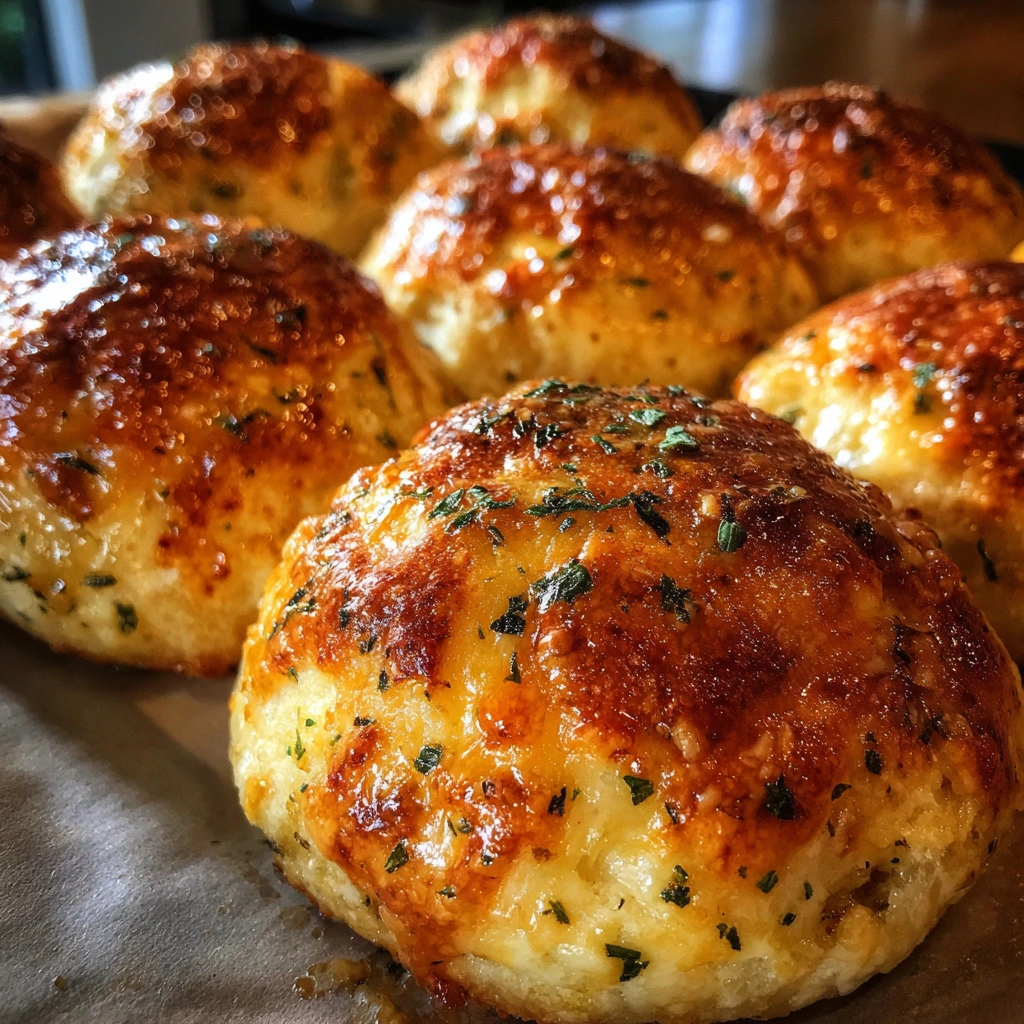
Why You’ll Love These Garlic Herb Cheese Bombs
Garlic Herb Cheese Bombs are a delightful treat that will make your taste buds dance! These cheesy, fluffy bites are bursting with flavor, thanks to the perfect blend of garlic and herbs. They have a golden, crispy exterior and a gooey, cheesy center that melts in your mouth. Perfect for parties, game days, or cozy family dinners, these cheese bombs are sure to impress your guests. Plus, they’re easy to make, so you can whip them up anytime you crave a savory snack!
What You’ll Need for Garlic Herb Cheese Bombs
Gathering the right ingredients is key to making delicious Garlic Herb Cheese Bombs. Here’s what you’ll need:
Complete Ingredients List
- 1 can of refrigerated biscuit dough (about 16 oz)
- 8 oz cream cheese, softened
- 1 teaspoon garlic powder
- 1 teaspoon dried oregano
- 1 teaspoon dried thyme
- 1 teaspoon dried parsley
- 1 cup shredded mozzarella cheese
- 4 tablespoons butter, melted
- 1/2 teaspoon garlic salt
Ingredient Substitutions & Alternatives
If you have dietary restrictions or preferences, here are some substitutions:
- Use vegan cream cheese and dairy-free biscuit dough for a dairy-free option.
- Swap out the biscuit dough for gluten-free dough if needed.
- Try different herbs like basil or dill for a unique flavor twist.
How to Make Garlic Herb Cheese Bombs

Making Garlic Herb Cheese Bombs is simple and fun! Follow these steps to create your cheesy masterpiece:
Step 1: Preheat the Oven
Start by preheating your oven to 375°F (190°C). This ensures your cheese bombs bake evenly and become golden brown.
Step 2: Prepare the Filling
In a mixing bowl, combine the softened cream cheese, garlic powder, dried oregano, dried thyme, dried parsley, and shredded mozzarella cheese. Mix until well combined and set aside.
Step 3: Prepare the Biscuit Dough
Open the can of refrigerated biscuit dough and separate the biscuits. Flatten each biscuit slightly with your hands or a rolling pin to create a larger surface area.
Step 4: Fill the Biscuits
Place a generous tablespoon of the cheese mixture in the center of each flattened biscuit. Carefully fold the edges of the biscuit over the filling, pinching to seal tightly. Make sure there are no openings for the cheese to escape during baking.
Step 5: Arrange on the Baking Sheet
Place the filled biscuit bombs seam-side down on the prepared baking sheet, spacing them about 2 inches apart.
Step 6: Brush with Butter
In a small bowl, mix the melted butter with garlic salt. Brush this mixture generously over the tops of each cheese bomb to give them a beautiful golden color and added flavor.
Step 7: Bake
Place the baking sheet in the preheated oven and bake for 15-20 minutes, or until the cheese bombs are golden brown and puffed up.
Step 8: Serve
Once baked, remove the cheese bombs from the oven and let them cool for a few minutes. Serve warm as a delightful appetizer or snack, enjoying the crispy exterior and the gooey, cheesy center.
🍴 Top Kitchen Essentials You’ll Love




Serving Suggestions for Garlic Herb Cheese Bombs
How to Serve Garlic Herb Cheese Bombs
Serve these cheese bombs warm for the best experience. You can arrange them on a platter for a beautiful presentation. For easy serving, consider using toothpicks!
Perfect Pairings & Toppings
These Garlic Herb Cheese Bombs pair wonderfully with marinara sauce for dipping. You can also sprinkle some extra herbs on top for added flavor.
Storing & Preserving Garlic Herb Cheese Bombs
Best Storage Methods
Store any leftover Garlic Herb Cheese Bombs in an airtight container in the refrigerator. They will stay fresh for up to three days.
Reheating or Freezing Tips
To reheat, simply pop them in the oven at 350°F (175°C) for about 10 minutes. If you want to freeze them, place the uncooked cheese bombs on a baking sheet, freeze until solid, then transfer to a freezer bag. Bake from frozen when ready!
Tips for Perfect Garlic Herb Cheese Bombs Every Time
Avoid These Common Mistakes
Make sure to seal the biscuits tightly to prevent the cheese from leaking out during baking. Also, don’t overfill them!
Helpful Tricks for Success
For extra flavor, brush the tops of the cheese bombs with olive oil before baking. This will give them a beautiful golden color and enhance the taste.
Fun Variations of Garlic Herb Cheese Bombs
Flavor Variations or Recipe Twists
Get creative! You can add cooked spinach, sun-dried tomatoes, or even bacon bits for a twist on the classic recipe.
Dietary-Friendly Adjustments
To make these cheese bombs vegan, use plant-based cheese and vegan biscuit dough. For a gluten-free option, choose gluten-free biscuit dough.
FAQs
What If My Garlic Herb Cheese Bombs Don’t Turn Out Right?
If your cheese bombs don’t rise or are too doughy, check your oven temperature. Make sure it’s preheated properly before baking.
Can I Prepare This in Advance?
Yes! You can prepare the cheese bombs ahead of time and store them in the fridge until you’re ready to bake.
What Ingredients Can I Swap?
You can swap mozzarella for any cheese you like, such as cheddar or pepper jack. Fresh herbs can also be replaced with dried herbs if needed.
Print
Garlic Herb Cheese Bombs
- Total Time: 35 minutes
- Yield: 12 cheese bombs 1x
- Diet: Vegetarian
Description
Garlic Herb Cheese Bombs are cheesy, fluffy bites bursting with flavor from garlic and herbs, featuring a crispy exterior and gooey center.
Ingredients
- 1 can of refrigerated biscuit dough (about 16 oz)
- 8 oz cream cheese, softened
- 1 teaspoon garlic powder
- 1 teaspoon dried oregano
- 1 teaspoon dried thyme
- 1 teaspoon dried parsley
- 1 cup shredded mozzarella cheese
- 4 tablespoons butter, melted
- 1/2 teaspoon garlic salt
Instructions
- Preheat your oven to 375°F (190°C).
- In a mixing bowl, combine the softened cream cheese, garlic powder, dried oregano, dried thyme, dried parsley, and shredded mozzarella cheese. Mix until well combined and set aside.
- Open the can of refrigerated biscuit dough and separate the biscuits. Flatten each biscuit slightly.
- Place a generous tablespoon of the cheese mixture in the center of each flattened biscuit. Fold the edges over the filling and pinch to seal tightly.
- Place the filled biscuit bombs seam-side down on a baking sheet, spacing them about 2 inches apart.
- Mix the melted butter with garlic salt and brush this mixture over the tops of each cheese bomb.
- Bake for 15-20 minutes, or until golden brown and puffed up.
- Remove from the oven and let cool for a few minutes before serving warm.
🍴 Top Kitchen Essentials You’ll Love
Notes
- Store leftovers in an airtight container in the refrigerator for up to three days.
- To reheat, bake at 350°F (175°C) for about 10 minutes.
- For freezing, place uncooked cheese bombs on a baking sheet, freeze until solid, then transfer to a freezer bag.
- Prep Time: 15 minutes
- Cook Time: 20 minutes
- Category: Appetizer
- Method: Baking
- Cuisine: American
Nutrition
- Serving Size: 1 cheese bomb
- Calories: 150
- Sugar: 1g
- Sodium: 300mg
- Fat: 10g
- Saturated Fat: 5g
- Unsaturated Fat: 3g
- Trans Fat: 0g
- Carbohydrates: 12g
- Fiber: 0g
- Protein: 4g
- Cholesterol: 20mg
Keywords: Garlic Herb Cheese Bombs, cheesy snacks, appetizers, party food