

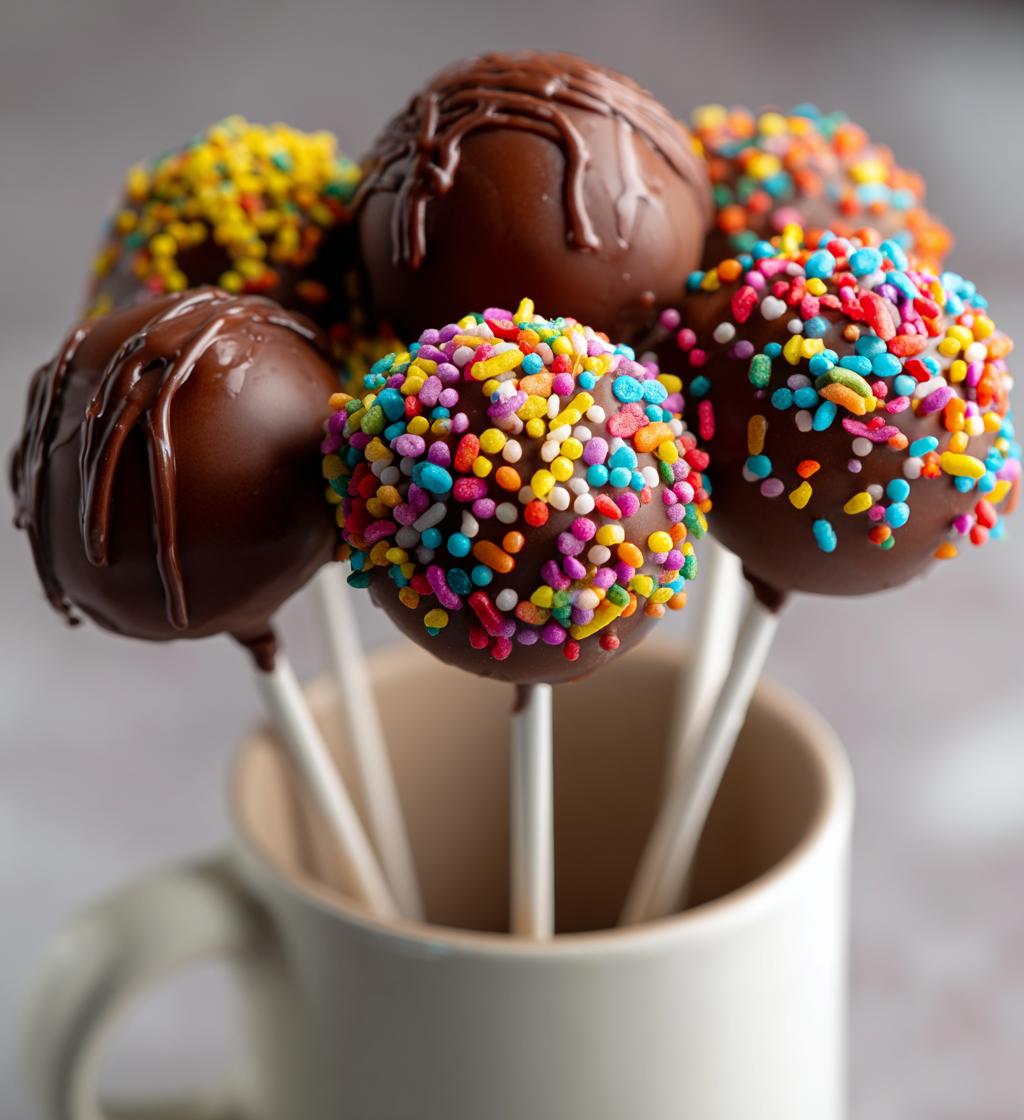
Cake pops have taken the dessert world by storm, becoming a staple at celebrations ranging from birthdays to weddings. These delightful bite-sized treats not only look adorable but also pack a punch of flavor that leaves everyone wanting more. I vividly remember the first time I made cake pops for my niece’s birthday party; the sheer joy on her face when she took her first bite was priceless. They were a hit among the kids and adults alike, showcasing just how versatile and fun cake pops can be.
Whether you’re looking for a creative way to use leftover cake or just want to impress your guests with a trendy dessert, cake pops are the perfect solution. In this article, we’ll dive deep into the world of cake pops, sharing everything you need to know to create these delicious treats from scratch. Get ready to learn how to make cake pops that will steal the show at your next gathering!
Ingredients List
- 1 box of cake mix (any flavor of your choice)
- 1 cup packed frosting (store-bought or homemade)
- 1 cup chocolate or candy melts (for coating)
- Sprinkles (optional, for decoration)
How to Prepare Cake Pops
Making cake pops is a delightful experience that combines baking and creativity. Follow these step-by-step instructions to ensure your cake pops turn out perfectly every time.
Step-by-Step Instructions
- Prepare and Bake the Cake: Start by preheating your oven according to the instructions on the cake mix box. Prepare the cake batter as directed, pouring it into a greased baking pan. Bake until a toothpick inserted in the center comes out clean. This usually takes about 25 to 30 minutes, depending on your oven. Once baked, remove the cake from the oven and allow it to cool in the pan for about 10 minutes before transferring it to a wire rack.
- Cool the Cake Completely: It’s crucial to let your cake cool completely to room temperature. This can take about 30 minutes. If the cake is still warm, it can melt the frosting, leading to a gooey mixture that will be difficult to shape into balls.
- Crumble the Cake: Once the cake has cooled, crumble it into a large mixing bowl using your hands or a fork. Make sure there are no large chunks; you want a fine, even crumble for the best texture in your cake pops.
- Add the Frosting: Incorporate 1 cup of frosting into the crumbled cake. Use your hands to mix until well combined. The mixture should hold together when rolled into a ball; if it’s too dry, add a bit more frosting. If it’s too wet, you may need to add more crumbled cake.
- Roll into Balls: With clean hands, take small portions of the cake mixture and roll them into balls about 1 inch in diameter. Place them on a parchment-lined baking sheet. This should yield around 24 cake pops, depending on the size of your balls.
- Insert Sticks: Carefully insert a stick into each cake ball, pushing it halfway through. This will help the cake pops stay intact when you dip them in chocolate later. If you’re having trouble with the sticks staying upright, you can dip the ends in melted chocolate before inserting them into the cake balls.
- Freeze the Cake Pops: Place the baking sheet with the cake pops in the freezer for about 30 minutes. This helps the cake balls firm up and ensures they won’t fall apart when dipped in chocolate.
- Melt Chocolate or Candy Melts: While the cake pops are freezing, melt your chocolate or candy melts according to the package instructions. Use a microwave-safe bowl and heat in 30-second increments, stirring in between, until fully melted and smooth.
- Dip the Cake Pops: Remove the cake pops from the freezer. Dip each one into the melted chocolate, swirling to coat evenly. Allow any excess chocolate to drip off before placing the pop back on the parchment-lined baking sheet.
- Decorate with Sprinkles: If desired, immediately sprinkle your cake pops with sprinkles or any other toppings before the chocolate sets. This adds a fun and colorful touch!
- Let Them Set: Allow the decorated cake pops to set on a foam block or in cups to keep them upright until the chocolate hardens completely. This usually takes about 30 minutes.
By following these steps, you’ll create delicious and visually appealing cake pops that are sure to impress your family and friends!
Why You’ll Love This Recipe
- Quick Preparation: With just a few simple steps, you can whip up a batch of cake pops in under an hour, making them perfect for last-minute celebrations.
- Easy to Customize: This recipe allows you to experiment with various cake flavors and frosting combinations, ensuring there’s a cake pop for everyone’s taste.
- Fun for All Ages: Making cake pops is a fun activity that kids and adults can enjoy together, making it an excellent choice for family gatherings or parties.
- Perfect for Any Occasion: Whether it’s a birthday, wedding, or holiday party, cake pops are an eye-catching treat that can fit any theme or celebration.
- Portable and Mess-Free: With their convenient stick, cake pops are easy to transport and eat, making them a no-fuss dessert option for events.
🍴 Top Kitchen Essentials You’ll Love




Tips for Success
Creating the perfect cake pops can be a rewarding experience, but a few tips and tricks can help elevate your cake pops from good to great. Here are some pro tips to ensure your cake pops turn out beautifully every time:
Avoid These Common Mistakes
- Insufficient Cooling: Ensure your cake is completely cooled before crumbling. If the cake is warm, it can lead to a mushy mixture that doesn’t hold well.
- Too Much or Too Little Frosting: Finding the right balance of frosting is key. Too much can make the mixture overly wet, while too little can prevent it from holding together.
- Not Freezing Long Enough: Don’t skip the freezing step! Properly chilling the cake balls prevents them from falling apart when dipped in chocolate.
Helpful Tricks for Success
- Use Quality Chocolate: Invest in high-quality chocolate or candy melts for coating. This makes a significant difference in taste and texture.
- Swirl for Even Coating: When dipping, gently swirl the cake pop in the melted chocolate to achieve an even coat. This helps avoid excess chocolate from pooling at the bottom.
- Experiment with Toppings: Get creative with your decorations! Use a variety of sprinkles, crushed nuts, or even edible glitter to make your cake pops pop visually.
- Use a Foam Block for Drying: To keep your cake pops upright while the chocolate sets, use a foam block or a cup filled with rice or beans, which allows them to dry without touching anything else.
By keeping these tips in mind, you’ll be well on your way to mastering the art of cake pops, impressing everyone with your delicious and beautifully decorated treats!
Variations
One of the best things about cake pops is their versatility. You can easily customize them to suit different tastes and occasions. Here are some creative ideas for altering the cake pops recipe to make them uniquely yours:
Flavor Variations
- Chocolate Cake Pops: Use a chocolate cake mix and pair it with chocolate frosting for a rich, double chocolate indulgence.
- Red Velvet Cake Pops: Opt for a red velvet cake mix and cream cheese frosting for a classic and festive treat.
- Carrot Cake Pops: For a unique twist, use a carrot cake mix and cream cheese frosting, adding nuts or raisins for extra texture.
- Funfetti Cake Pops: Incorporate sprinkles into the cake batter and frosting for a colorful and joyful appearance, perfect for celebrations.
Coating Options
- White Chocolate Coating: Swap out traditional chocolate for white chocolate melts for a sweet and creamy flavor that pairs well with fruity cake flavors.
- Colored Chocolate Melts: Use colored candy melts to match a theme or occasion, such as pastel colors for a baby shower or bold hues for a birthday party.
- Dark Chocolate Coating: For a more sophisticated flavor, opt for dark chocolate melts, which can be paired with a rich chocolate or coffee-flavored cake.
Topping Ideas
- Crushed Nuts: Add a delightful crunch by rolling your cake pops in crushed nuts after dipping them in chocolate.
- Edible Glitter: For a glamorous touch, sprinkle edible glitter over the chocolate coating before it sets.
- Coconut Flakes: Roll your cake pops in shredded coconut for a tropical flavor and texture.
- Drizzled Chocolate: After the cake pops are coated and set, drizzle a contrasting chocolate color over the top for an elegant finish.
These variations not only add different flavors and textures to your cake pops but also make them visually appealing, ensuring they are the star of any dessert table!
Storage & Reheating Instructions
Properly storing your cake pops ensures they stay fresh and delicious for as long as possible. Here’s how to go about it:
Best Storage Methods
To store leftover cake pops, follow these simple steps:
- Refrigeration: Place the cake pops in an airtight container, separating layers with parchment paper to prevent them from sticking together. They can be stored in the refrigerator for up to a week.
- Room Temperature: If you plan to enjoy the cake pops within a day or two, they can be kept at room temperature in a cool, dry place, again in an airtight container.
- Freezing: For longer storage, cake pops can be frozen. Place them in a single layer on a baking sheet to freeze them individually, then transfer to an airtight container or a freezer bag. They can be frozen for up to three months.
Reheating Tips
If you have frozen cake pops, here’s how to properly defrost and enjoy them:
- Thawing: Remove the cake pops from the freezer and let them thaw in the refrigerator overnight. This helps maintain their texture without compromising the chocolate coating.
- Room Temperature: If you’re short on time, you can also let them sit at room temperature for about 30 minutes before serving.
- No Reheating Required: Cake pops are best enjoyed chilled or at room temperature, so there’s no need to reheat them in the microwave or oven, as this can melt the coating and affect the texture.
By following these storage and reheating instructions, you can keep your cake pops fresh and ready to delight your taste buds whenever the craving strikes!
Nutritional Information Section
When indulging in delicious cake pops, it’s always good to know what you’re consuming. Below is the estimated nutritional information for one cake pop:
- Calories: 150
- Fat: 7g
- Saturated Fat: 4g
- Unsaturated Fat: 2g
- Trans Fat: 0g
- Cholesterol: 20mg
- Sodium: 50mg
- Carbohydrates: 18g
- Fiber: 0g
- Sugar: 12g
- Protein: 2g
Keep in mind that these values are estimates and can vary based on the specific ingredients used and portion sizes. Enjoy your cake pops in moderation as part of a balanced diet!
FAQ Section
What If My Cake Pops Don’t Turn Out Right?
If your cake pops don’t turn out as expected, don’t worry! Here are a few troubleshooting tips:
- Too Crumbly: If your mixture is too crumbly, it may need more frosting. Gradually add more frosting until it holds together.
- Too Wet: If the mixture is too wet, add more crumbled cake to balance it out.
- Chocolate Coating Not Sticking: Ensure your cake pops are fully chilled before dipping. If necessary, dip the sticks in melted chocolate before inserting them into the cake balls to help them stick better.
Can I Prepare This in Advance?
Yes! Cake pops can be prepared in advance and stored properly. You can make the cake pops up to a week ahead of time and keep them in the refrigerator. If you wish to freeze them, follow the freezing instructions mentioned earlier. Just remember to allow them to thaw in the refrigerator overnight before serving.
What Ingredients Can I Swap?
There are plenty of ingredient swaps you can make for cake pops:
- Gluten-Free: Use a gluten-free cake mix to make your cake pops gluten-free.
- Dairy-Free: Substitute dairy-free frosting and chocolate melts to cater to lactose intolerance or dairy allergies.
- Flavor Variations: Don’t hesitate to experiment with different cake and frosting flavors, such as lemon cake with cream cheese frosting or chocolate cake with peanut butter frosting.
These substitutions will help you tailor your cake pops to meet specific dietary needs or personal preferences!
Print
Cake Pops
- Total Time: 1 hour
- Yield: 24 cake pops 1x
- Diet: Vegetarian
Description
Cake pops are bite-sized cake balls coated in chocolate or candy melts on a stick.
Ingredients
- 1 box cake mix
- 1 cup frosting
- 1 cup chocolate or candy melts
- Sprinkles (optional)
Instructions
- Prepare and bake the cake according to package instructions.
- Let the cake cool completely.
- Crumble the cake into a large bowl.
- Add frosting and mix until combined.
- Roll the mixture into small balls.
- Insert sticks into each ball.
- Freeze for about 30 minutes.
- Melt chocolate or candy melts.
- Dip each cake pop into the melted chocolate.
- Decorate with sprinkles if desired.
- Let them set on a foam block or in a cup.
Notes
- Use any flavor of cake mix.
- Store in the refrigerator for up to a week.
- Experiment with different coatings and toppings.
- Prep Time: 20 minutes
- Cook Time: 30 minutes
- Category: Dessert
- Method: Baking
- Cuisine: American
Nutrition
- Serving Size: 1 cake pop
- Calories: 150
- Sugar: 12g
- Sodium: 50mg
- Fat: 7g
- Saturated Fat: 4g
- Unsaturated Fat: 2g
- Trans Fat: 0g
- Carbohydrates: 18g
- Fiber: 0g
- Protein: 2g
- Cholesterol: 20mg
Keywords: Cake Pops