

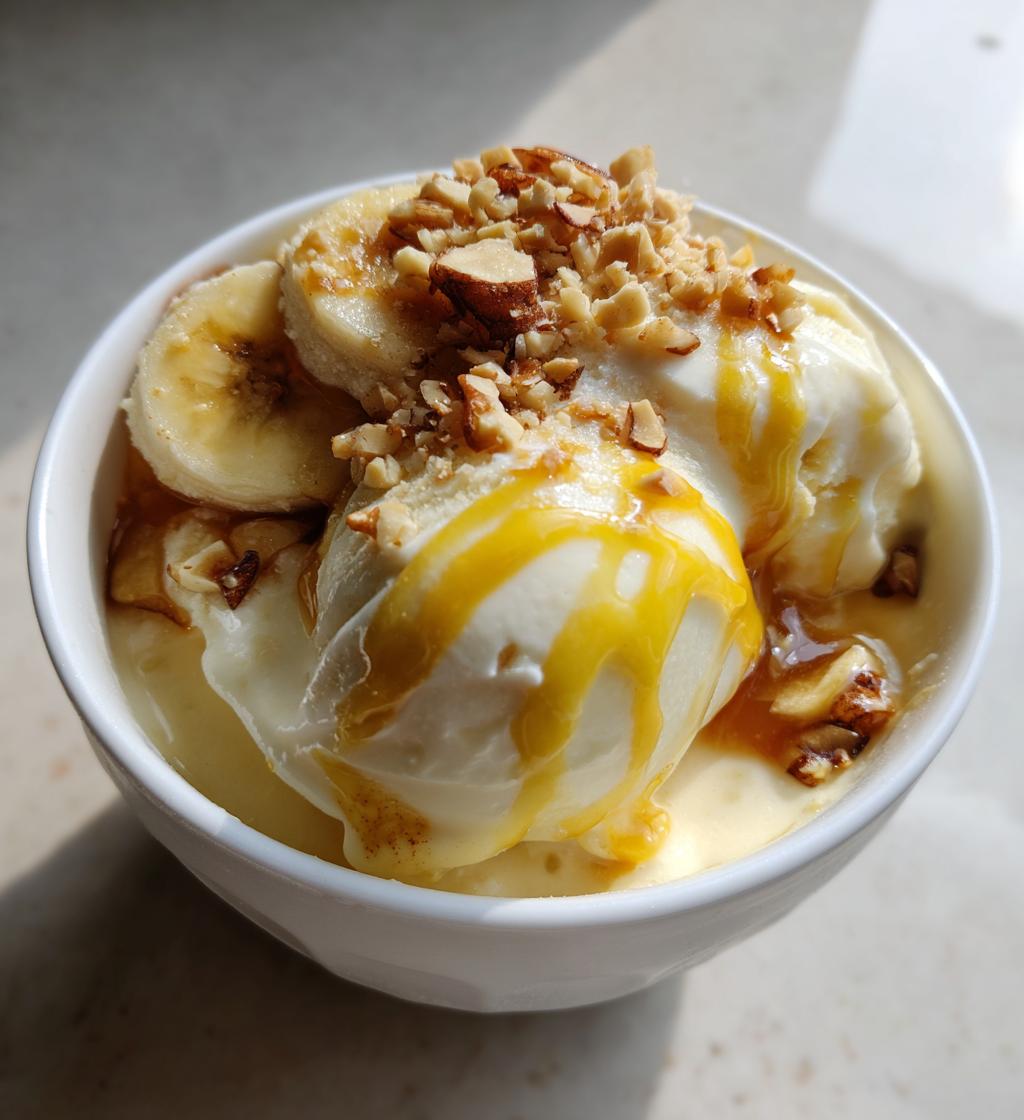
Have you ever craved a sweet treat that feels indulgent but is actually healthy? Look no further than the delightful Banana Ice Cream Ninja Creami. This simple recipe is not only a breeze to prepare, but it also offers a guilt-free way to satisfy your ice cream cravings. With just a few ripe bananas and a couple of pantry staples, you can whip up a creamy, dreamy dessert that is both vegan and naturally sweetened.

As someone who has always loved ice cream, discovering how easy it is to make a healthier version at home has been a game changer. I remember the first time I made this recipe; I was amazed at how the Ninja Creami transformed frozen bananas into a smooth, velvety treat. It’s the perfect base for experimenting with different flavors, and it’s a hit with everyone in my family. Whether you enjoy it on a hot summer day or as a comforting evening snack, this banana ice cream will quickly become a staple in your dessert repertoire. Plus, it’s packed with nutrients, making it a great choice for those looking to indulge mindfully.
Ingredients List
- 4 ripe bananas, sliced: Choose bananas that are fully ripe for the best flavor and creaminess. Slice them into small pieces for easier blending.
- 1 cup almond milk: Use unsweetened almond milk for a lighter taste, or substitute with any plant-based milk of your choice.
- 2 tablespoons honey or maple syrup: This adds natural sweetness; feel free to adjust the amount based on your sweetness preference.
- 1 teaspoon vanilla extract: Enhances the flavor profile; use pure vanilla extract for optimal taste.
How to Prepare Banana Ice Cream Ninja Creami
Making your own Banana Ice Cream Ninja Creami is incredibly simple and rewarding. Follow these easy steps to create a delicious, creamy dessert that will have everyone asking for more.
Step-by-Step Instructions
- Prepare the Bananas: Start by selecting 4 ripe bananas. The riper the bananas, the sweeter and creamier your ice cream will be. Peel the bananas and slice them into small pieces. This will help them freeze faster and blend more easily.
- Combine Ingredients: In a freezer-safe container, add the sliced bananas along with 1 cup of unsweetened almond milk, 2 tablespoons of honey or maple syrup, and 1 teaspoon of vanilla extract. Make sure to mix everything thoroughly to ensure the bananas are well coated and the liquids are evenly distributed.
- Freeze the Mixture: Cover the container tightly and place it in the freezer. Allow the mixture to freeze for at least 4 hours, or until it is completely solid. It’s important to give it enough time to freeze to achieve that perfect ice cream texture.
- Let It Sit: Once frozen, remove the container from the freezer and let it sit at room temperature for about 5 minutes. This will soften the mixture slightly, making it easier to process in the Ninja Creami.
- Process in the Ninja Creami: Transfer the frozen banana mixture to the Ninja Creami bowl. Lock the bowl into place and select the “ice cream” setting. Follow the manufacturer’s instructions for processing. The Ninja Creami will turn the frozen mixture into a smooth and creamy consistency in just a few minutes.
- Scoop and Serve: Once the processing is complete, scoop the banana ice cream into bowls or cones. Serve immediately for the best texture and flavor. Enjoy your delicious homemade Banana Ice Cream Ninja Creami!
This straightforward method ensures that anyone, regardless of their cooking experience, can create a delightful treat that’s both healthy and tasty. Don’t hesitate to get creative with toppings or mix-ins after processing!
Why You’ll Love This Recipe
- Quick Preparation: This recipe takes just 10 minutes of active time, making it a hassle-free dessert option.
- Vegan-Friendly: Made with simple plant-based ingredients, it’s perfect for anyone following a vegan diet.
- Natural Sweetness: The use of ripe bananas and a touch of honey or maple syrup provides a deliciously sweet taste without added sugars.
- Customizable: This banana ice cream serves as a great base for various flavors and mix-ins, allowing you to get creative.
- Healthy Indulgence: Packed with nutrients and free from artificial ingredients, this treat satisfies your sweet tooth guilt-free.
🍴 Top Kitchen Essentials You’ll Love




Tips for Success
To ensure your Banana Ice Cream Ninja Creami turns out perfectly every time, here are some essential tips:
- Choose the Right Bananas: Use bananas that are very ripe; their natural sweetness and flavor will enhance your ice cream. Look for bananas with brown spots, as they are the sweetest.
- Adjust Sweetness to Taste: The sweetness of your banana ice cream can be adjusted based on personal preference. Start with the recommended 2 tablespoons of honey or maple syrup, then taste before freezing to see if you’d like to add more.
- Freeze Properly: Ensure the banana mixture is spread evenly in your container before freezing. This helps it freeze uniformly and makes processing easier.
- Don’t Skip the Soaking Time: Allow the mixture to sit at room temperature for about 5 minutes after removing it from the freezer. This will soften it slightly, making it easier to blend in the Ninja Creami.
- Experiment with Mix-Ins: Once you’ve mastered the base recipe, try adding cocoa powder, nut butters, or fresh fruit for unique flavors and textures.
Variations
One of the best aspects of the Banana Ice Cream Ninja Creami is its versatility. Here are some fun variations to try out:
Flavor Variations or Recipe Twists
- Chocolate Banana Ice Cream: Add 2 tablespoons of unsweetened cocoa powder to the mixture before freezing for a rich chocolate flavor.
- Nutty Banana Ice Cream: Mix in 1/4 cup of your favorite nut butter, such as almond or peanut butter, for a creamy, nutty twist.
- Berry Banana Ice Cream: Incorporate 1/2 cup of fresh or frozen berries, like strawberries or blueberries, for a fruity and vibrant flavor.
Dairy-Free and Dietary-Friendly Adjustments
- Vegan Version: This recipe is already vegan-friendly, but you can enhance it by using maple syrup instead of honey.
- Gluten-Free Option: Rest assured, this banana ice cream is naturally gluten-free, so it’s a safe treat for those with gluten sensitivities.
Feel free to experiment with your favorite flavors and mix-ins to create a unique banana ice cream that suits your palate!
Storage & Reheating Instructions
To store your leftover Banana Ice Cream Ninja Creami, transfer it to an airtight container and place it in the freezer. It will remain fresh for up to one week. When you’re ready to enjoy it again, simply remove the container from the freezer and let it sit at room temperature for about 10-15 minutes to soften slightly before scooping. If you find the ice cream too hard, you can also process it again in the Ninja Creami for a smoother texture. Enjoy your delicious banana ice cream whenever you crave a sweet treat!
Nutritional Information
The Banana Ice Cream Ninja Creami is not only a delicious treat but also a healthy option packed with nutrients. Here’s a breakdown of the estimated nutritional values per serving (1/2 cup):
- Calories: 120
- Fat: 2g
- Saturated Fat: 0g
- Carbohydrates: 26g
- Sugar: 14g
- Fiber: 2g
- Protein: 2g
- Sodium: 50mg
- Cholesterol: 0mg
This makes it a guilt-free dessert option that satisfies your sweet cravings while providing essential nutrients!
FAQ Section
What If My Banana Ice Cream Ninja Creami Doesn’t Turn Out Right?
If your Banana Ice Cream Ninja Creami doesn’t have the right texture, it could be due to not freezing it long enough or not allowing it to soften before processing. Ensure that you freeze the mixture for a full 4 hours and let it sit at room temperature for about 5 minutes before blending. If it’s still too hard, you can process it again in the Ninja Creami for a smoother consistency.
Can I Prepare This in Advance?
Absolutely! You can prepare your Banana Ice Cream Ninja Creami mixture a day or two in advance. Just store it in an airtight container in the freezer until you’re ready to process it. This is a great way to have a quick and easy dessert on hand for unexpected guests or a sweet treat after dinner.
What Ingredients Can I Swap?
If you want to customize your Banana Ice Cream Ninja Creami, there are several ingredient swaps you can consider. For a nut-free option, replace almond milk with oat milk or coconut milk. You can also use agave syrup or stevia instead of honey or maple syrup for a different sweetener. Feel free to mix in flavors like cinnamon or nutmeg for a unique twist!
Print
Banana Ice Cream Ninja Creami
- Total Time: 4 hours 10 minutes
- Yield: 4 servings 1x
- Diet: Vegan
Description
A simple recipe for making banana ice cream using the Ninja Creami.
Ingredients
- 4 ripe bananas, sliced
- 1 cup almond milk
- 2 tablespoons honey or maple syrup
- 1 teaspoon vanilla extract
Instructions
- Place the sliced bananas in a freezer-safe container.
- Add almond milk, honey or maple syrup, and vanilla extract.
- Mix well and freeze for at least 4 hours or until solid.
- Remove from freezer and let sit for 5 minutes.
- Process in the Ninja Creami according to the manufacturer’s instructions.
- Scoop and serve immediately.
🍴 Top Kitchen Essentials You’ll Love
Notes
- Use ripe bananas for best flavor.
- Adjust sweetness to taste.
- Store any leftovers in the freezer.
- Prep Time: 10 minutes
- Cook Time: 0 minutes
- Category: Dessert
- Method: Freezing
- Cuisine: American
Nutrition
- Serving Size: 1/2 cup
- Calories: 120
- Sugar: 14g
- Sodium: 50mg
- Fat: 2g
- Saturated Fat: 0g
- Unsaturated Fat: 2g
- Trans Fat: 0g
- Carbohydrates: 26g
- Fiber: 2g
- Protein: 2g
- Cholesterol: 0mg
Keywords: Banana Ice Cream, Ninja Creami, Vegan Dessert, Easy Ice Cream Recipe