

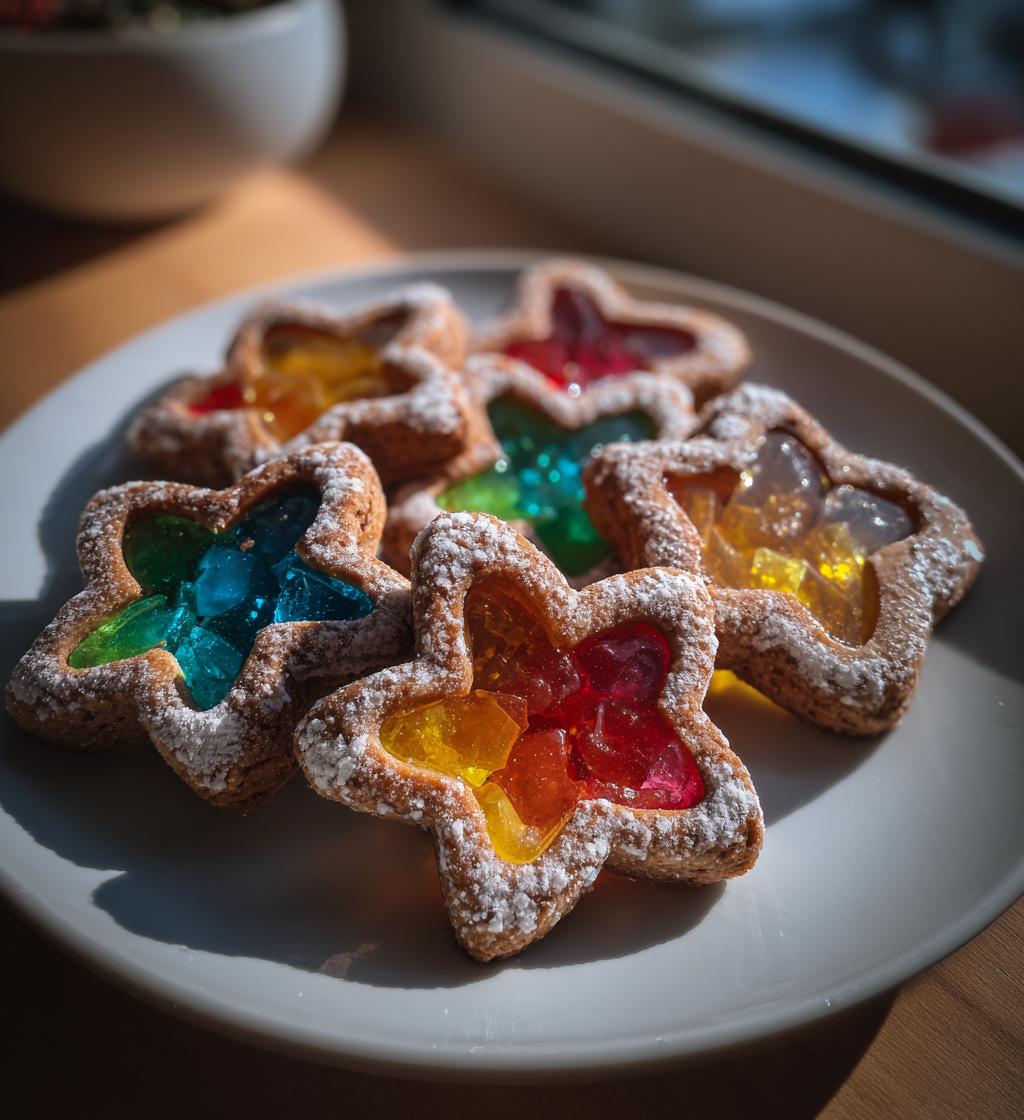
Stained glass cookies are not just a treat for the taste buds; they are a feast for the eyes as well. With their vibrant colors and intricate designs, these cookies resemble beautiful stained glass windows, making them a perfect addition to any festive gathering. I still remember the first time I made stained glass cookies with my family during the holiday season. The kitchen was filled with laughter and excitement as we crushed colorful hard candies and cut out shapes from the dough. Each cookie was unique, and the thrill of watching the candies melt into a shimmering masterpiece in the oven was unforgettable. These cookies bring joy to any occasion, whether it’s a holiday celebration, a birthday party, or simply a sweet treat for loved ones. Join me in discovering how to create these delightful stained glass cookies that are sure to impress everyone!

Ingredients for Stained Glass Cookies
To create the colorful and visually stunning stained glass cookies, you will need the following ingredients:
- 2 3/4 cups all-purpose flour: This forms the base of the cookie dough, providing structure and texture.
- 1 teaspoon baking powder: This leavening agent helps the cookies rise and become light and fluffy.
- 1/2 teaspoon salt: A small amount of salt enhances the flavors of the other ingredients.
- 1 cup unsalted butter, softened: The butter adds richness and a delightful flavor to the cookies.
- 1 cup granulated sugar: This sweetens the cookies and contributes to their delightful texture.
- 1 large egg: The egg binds the ingredients together and adds moisture to the dough.
- 1 teaspoon vanilla extract: This adds a lovely aroma and flavor to the cookies.
- 1 cup crushed hard candies (various colors): These candies are the star of the show, providing the beautiful stained glass effect once melted.
How to Prepare Stained Glass Cookies
Preheat the Oven
Begin by preheating your oven to 350°F (175°C). Preheating is crucial as it ensures that the cookies start baking at the right temperature, allowing them to rise properly and achieve a perfect texture.
Prepare Dry Ingredients
In a medium-sized bowl, combine the 2 3/4 cups of all-purpose flour, 1 teaspoon of baking powder, and 1/2 teaspoon of salt. Whisk these dry ingredients together until they are evenly mixed. This step ensures that the leavening agent is evenly distributed throughout the flour, which is essential for the cookies to rise uniformly.
Cream the Butter and Sugar
In another large mixing bowl, use an electric mixer to cream together 1 cup of softened unsalted butter and 1 cup of granulated sugar until the mixture is light and fluffy. This process usually takes about 2-3 minutes. Properly creamed butter and sugar create air pockets that help the cookies achieve a light and airy texture.
Combine Wet Ingredients
Add 1 large egg and 1 teaspoon of vanilla extract to the butter-sugar mixture. Mix well until fully incorporated. The egg acts as a binder, while the vanilla extract enhances the flavor of the cookies.
Mix Wet and Dry Ingredients
Gradually add the flour mixture to the wet ingredients, mixing until just combined. Be careful not to overmix, as this can lead to tougher cookies. The dough should be cohesive but still slightly sticky.
Chill the Dough
Once the dough is mixed, cover it with plastic wrap and chill it in the refrigerator for at least 30 minutes. Chilling the dough is essential as it firms up the butter, making it easier to roll out and cut into shapes without losing their form during baking.
Shape the Cookies
After chilling, lightly flour a clean surface and roll out the dough to about 1/4 inch thickness. Use cookie cutters to cut out various shapes. Remember to cut out the centers of the cookies using smaller cookie cutters or a knife, as this space will be filled with the crushed candies.
Fill with Candies
Carefully fill the cut-out centers of each cookie with 1 cup of crushed hard candies, distributing the candies evenly. Ensure not to overfill, as the candies will melt and spread during baking.
Bake the Cookies
Place the prepared cookies on a baking sheet lined with parchment paper and bake them in the preheated oven for 8-10 minutes, or until the edges are lightly golden. Once baked, allow the cookies to cool completely on the baking sheet before transferring them to a wire rack. This cooling period is vital as it helps the candies harden and maintain their stained glass look.
Why You’ll Love This Recipe
- Visual Appeal: Stained glass cookies are not only delicious but also stunning to look at, making them a show-stopping treat for any gathering.
- Easy to Prepare: With simple ingredients and straightforward steps, you can whip up these cookies in no time, even as a beginner baker.
- Versatile for Occasions: Perfect for holidays, birthdays, or any celebration, these cookies can be customized with different shapes and colors to suit any event.
- Fun Activity: Making stained glass cookies is a fun and creative activity that you can enjoy with family and friends, especially when it comes to choosing colors and shapes.
- Delicious Taste: The combination of buttery cookie dough and sweet, melted candies creates a delightful flavor that will please both kids and adults alike.
🍴 Top Kitchen Essentials You’ll Love




Tips for Success
To ensure your stained glass cookies turn out perfectly every time, consider the following practical tips:
Use Different Colored Candies
For a vibrant and eye-catching appearance, don’t hesitate to mix various colored hard candies. This not only enhances the visual appeal of your cookies but also allows you to create unique combinations for different occasions. Consider using seasonal colors for holidays or your favorite color palette for birthdays.
Experiment with Shapes
While traditional cookie shapes like stars and hearts are popular, feel free to get creative! Use cookie cutters in fun shapes such as animals, flowers, or festive symbols. This adds a personal touch and makes the cookies more fun, especially for kids.
Ensure Proper Baking Time
Keep a close eye on the cookies as they bake. Every oven is different, and baking times can vary. Start checking the cookies at the 8-minute mark to prevent over-baking. The cookies should be lightly golden around the edges but still soft in the center, as they will continue to firm up as they cool.
Don’t Skip Chilling the Dough
Chilling the dough is a crucial step that helps maintain the shape of the cookies during baking. If the dough feels too soft to work with after mixing, refrigerate it for an additional 10-15 minutes before rolling it out. This will make it easier to cut out shapes without the dough spreading too much.
Add Flavor Variations
Consider adding a touch of flavor by incorporating extracts such as almond, lemon, or orange to the dough. This can elevate the taste of your stained glass cookies and make them even more delightful. Just be cautious not to overpower the original vanilla flavor.
Practice Patience with Cooling
After baking, it’s tempting to dive right into the cookies. However, allowing them to cool completely on the baking sheet before transferring to a wire rack is essential. This ensures that the melted candies harden properly, creating that stunning stained glass effect.
Nutritional Information
When indulging in stained glass cookies, it’s essential to consider their nutritional content. Please note that the nutritional values may vary based on the specific ingredients and brands used. Below is a typical breakdown for one stained glass cookie:
- Calories: 150
- Fat: 7g
- Saturated Fat: 4g
- Unsaturated Fat: 2g
- Trans Fat: 0g
- Cholesterol: 30mg
- Sodium: 50mg
- Carbohydrates: 20g
- Fiber: 0g
- Sugar: 10g
- Protein: 2g
Enjoy these colorful cookies in moderation, and they can be a delightful treat as part of a balanced diet!
FAQ About Stained Glass Cookies
Can I use different types of candies?
Absolutely! You can use various types of hard candies to create unique stained glass effects. Popular choices include Jolly Ranchers, Life Savers, or any other colorful hard candies. Feel free to experiment with different flavors and colors to match your occasion or personal preference.
How do I store the cookies?
To keep your stained glass cookies fresh, store them in an airtight container at room temperature. They can last for about a week. If you plan to keep them longer, you can refrigerate them, but be aware that the texture may change slightly. Always allow them to come to room temperature before serving for the best flavor and texture.
Can I prepare the dough in advance?
Yes, you can prepare the dough in advance! After mixing, wrap the dough tightly in plastic wrap and refrigerate it for up to three days. When you’re ready to bake, simply take it out, let it soften slightly for easier rolling, and then proceed with shaping and baking as directed.
What should I do if my cookies spread too much while baking?
If your stained glass cookies spread excessively while baking, it may be due to the dough being too warm or not chilled long enough. To prevent this, ensure you chill the dough for at least 30 minutes before rolling it out. Additionally, you can refrigerate the shaped cookies for another 10-15 minutes before baking to help them hold their shape better.
Can I make these cookies vegan?
Yes, you can make stained glass cookies vegan by substituting the egg with a vegan alternative such as flaxseed meal mixed with water or a commercial egg replacer. Additionally, ensure that the hard candies used are vegan-friendly, as some candies may contain animal-derived ingredients.
Serving Suggestions
Stained glass cookies are not only a delightful treat on their own but can also be enhanced with some creative serving ideas. Here are a few suggestions to elevate your cookie experience:
Complement with Beverages
Pair your stained glass cookies with a warm beverage such as hot cocoa, tea, or coffee. The rich flavors of these drinks will complement the sweetness of the cookies perfectly. For a festive touch, consider serving them with spiced chai or peppermint hot chocolate during the holiday season.
Create a Dessert Platter
Present your stained glass cookies on a beautiful dessert platter alongside other sweet treats. Mix them with brownies, mini cupcakes, or other holiday cookies to create an enticing display that will wow your guests. This not only adds variety but also makes for a stunning visual presentation.
Decorate with Icing
Add a touch of flair by decorating your stained glass cookies with royal icing or a simple glaze. You can create intricate designs or just drizzle icing over the cookies for an elegant finish. Use vibrant colors to enhance the stained glass effect and make the cookies even more visually appealing.
Include Fresh Fruits
Serve your cookies alongside a platter of fresh fruits such as strawberries, blueberries, or sliced kiwi. The natural sweetness and acidity of the fruits provide a refreshing contrast to the richness of the cookies, making for a delightful combination.
Gift Them as Treats
Stained glass cookies make excellent gifts for friends and family, especially during the holidays. Consider packaging them in decorative boxes or clear bags tied with a ribbon. This thoughtful gesture not only shares the joy of baking but also showcases your creativity and culinary skills.
With these serving suggestions, you can enhance your stained glass cookie experience and create memorable moments with family and friends!
Storage & Reheating Instructions
To keep your stained glass cookies fresh and delicious, proper storage is essential. Here’s how to store any leftovers and tips for reheating if needed:
Storing Stained Glass Cookies
Once your cookies are completely cooled, place them in an airtight container. You can layer them between sheets of parchment paper to prevent sticking and maintain their shape. Store the container in a cool, dry place at room temperature. When stored properly, stained glass cookies can last for up to a week.
Reheating Tips
If you prefer to enjoy your stained glass cookies warm, you can easily reheat them. Preheat your oven to 300°F (150°C) and place the cookies on a baking sheet. Heat them for about 5-7 minutes or until they are warmed through. Avoid using the microwave for reheating, as it can make the cookies chewy rather than maintain their crisp texture.
Following these storage and reheating tips will ensure that your stained glass cookies remain delightful treats long after baking!
Print
Stained Glass Cookies
- Total Time: 40 minutes
- Yield: 24 cookies 1x
- Diet: Vegetarian
Description
Colorful and visually appealing cookies that resemble stained glass.
Ingredients
- 2 3/4 cups all-purpose flour
- 1 teaspoon baking powder
- 1/2 teaspoon salt
- 1 cup unsalted butter, softened
- 1 cup granulated sugar
- 1 large egg
- 1 teaspoon vanilla extract
- 1 cup crushed hard candies (various colors)
Instructions
- Preheat your oven to 350°F (175°C).
- In a bowl, combine flour, baking powder, and salt.
- In another bowl, cream butter and sugar until light and fluffy.
- Add egg and vanilla to the butter mixture and mix well.
- Gradually add the flour mixture to the wet ingredients and mix until combined.
- Chill the dough for at least 30 minutes.
- Roll out the dough on a floured surface and cut shapes using cookie cutters.
- Cut out the centers of the cookies and fill with crushed candies.
- Place cookies on a baking sheet and bake for 8-10 minutes.
- Let cookies cool completely before serving.
🍴 Top Kitchen Essentials You’ll Love
Notes
- Use different colored candies for a vibrant look.
- Store cookies in an airtight container.
- Experiment with different shapes for fun variations.
- Prep Time: 30 minutes
- Cook Time: 10 minutes
- Category: Dessert
- Method: Baking
- Cuisine: American
Nutrition
- Serving Size: 1 cookie
- Calories: 150
- Sugar: 10g
- Sodium: 50mg
- Fat: 7g
- Saturated Fat: 4g
- Unsaturated Fat: 2g
- Trans Fat: 0g
- Carbohydrates: 20g
- Fiber: 0g
- Protein: 2g
- Cholesterol: 30mg
Keywords: Stained Glass Cookies, colorful cookies, holiday cookies