

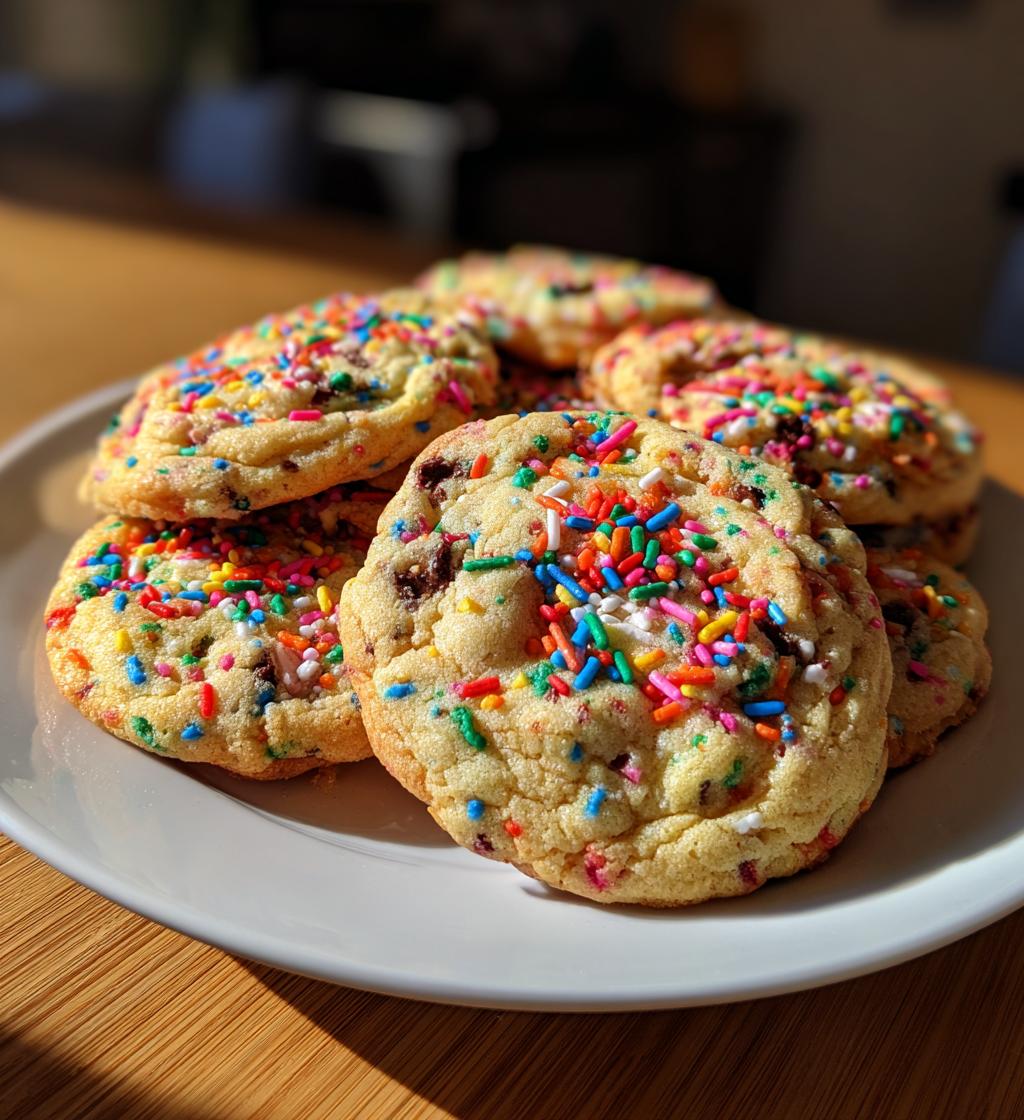
As the leaves turn and spooky decorations begin to adorn our homes, the excitement of Halloween fills the air. One of the best ways to celebrate this magical season is through festive baking, and what better treat to whip up than *hocus pocus cookies*? These delightful cookies bring a touch of whimsy and fun to any Halloween gathering, making them a must-have for the season. Picture this: a warm kitchen filled with the sweet aroma of cookies baking, colorful sprinkles dancing in the mix, and laughter echoing as you share this experience with family and friends. I still remember the first time I made these cookies; my kids were thrilled to help out, tossing in sprinkles with reckless abandon and giggling at the thought of magical treats. The joy and delight that these *hocus pocus cookies* bring are truly unparalleled, making them the perfect addition to your Halloween festivities.

Ingredients List
To create the delightful *hocus pocus cookies*, you’ll need the following ingredients:
- 1 cup unsalted butter, softened: This will provide the rich base for your cookies.
- 1 cup granulated sugar: Adds sweetness and contributes to the cookie’s texture.
- 1 cup brown sugar, packed: For a deeper flavor and chewy texture.
- 2 large eggs: Essential for binding the ingredients together.
- 1 teaspoon vanilla extract: Enhances the overall flavor profile.
- 3 cups all-purpose flour: The main structure of the cookies.
- 1 teaspoon baking soda: Acts as a leavening agent, helping the cookies rise.
- 1 teaspoon salt: Balances the sweetness and enhances flavors.
- 2 cups chocolate chips: Choose semi-sweet or milk chocolate for added sweetness.
- 1 cup colorful sprinkles: A fun and festive addition for decoration and flavor.
How to Prepare Hocus Pocus Cookies
Step 1 – Preheat the Oven
Start by preheating your oven to 350°F (175°C). Preheating is crucial as it ensures even baking and helps the cookies rise correctly. This initial step sets the stage for perfectly baked *hocus pocus cookies*.
Step 2 – Cream the Butter and Sugars
In a large mixing bowl, combine the softened unsalted butter, granulated sugar, and packed brown sugar. Using a hand mixer or stand mixer, beat the mixture on medium speed until it becomes light and fluffy. This creaming process incorporates air into the butter, creating a tender texture for your cookies.
Step 3 – Add Eggs and Vanilla
Add the two large eggs, one at a time, to the creamed butter and sugars. Mix well after each addition. Then, pour in the teaspoon of vanilla extract. Continue mixing until the mixture is smooth and well combined, ensuring that all ingredients are fully integrated.
Step 4 – Combine Dry Ingredients
In a separate bowl, whisk together the all-purpose flour, baking soda, and salt. This step is essential as it evenly distributes the leavening agent and ensures that your *hocus pocus cookies* rise properly. Make sure there are no lumps in the flour before proceeding.
Step 5 – Mix Wet and Dry Ingredients
Gradually add the dry ingredients into the wet mixture, mixing on low speed until just combined. Be careful not to overmix, as this can lead to tough cookies. The dough should be thick and slightly sticky, a sign that you’ve achieved the right consistency.
Step 6 – Fold in Chocolate Chips and Sprinkles
Using a spatula, gently fold in the chocolate chips and colorful sprinkles. Folding is a technique that helps maintain the airiness of the dough while evenly distributing the mix-ins. Aim for an even distribution without overworking the dough.
Step 7 – Prepare the Baking Sheet
Line a baking sheet with parchment paper to prevent the cookies from sticking. Using a cookie scoop or a tablespoon, drop spoonfuls of cookie dough onto the prepared baking sheet, leaving about 2 inches of space between each cookie to allow for spreading during baking.
Step 8 – Bake the Cookies
Place the baking sheet in the preheated oven and bake the cookies for 10-12 minutes or until the edges are golden brown. Keep an eye on them; the centers may look slightly soft, but they will continue to firm up as they cool.
Step 9 – Cooling Process
Once baked, remove the cookies from the oven and let them cool on the baking sheet for about 5 minutes. This resting time allows them to set before transferring to a wire rack to cool completely. Enjoy the delightful aroma as they cool down!
Why You’ll Love Hocus Pocus Cookies
Hocus Pocus cookies are the perfect treat for Halloween festivities, bringing a sense of fun and magic to your celebrations. These cookies are not only easy to make, but they also offer a delightful combination of flavors that will please both kids and adults alike. The colorful sprinkles add a festive touch, making them visually appealing for any Halloween gathering. Plus, with their soft, chewy texture and rich chocolate chips, these cookies are sure to be a crowd-pleaser. Baking and sharing Hocus Pocus cookies is a wonderful way to create lasting memories with family and friends this spooky season!
🍴 Top Kitchen Essentials You’ll Love




Tips for Success
To ensure your hocus pocus cookies turn out perfectly every time, consider these pro tips. First, make sure your butter is at room temperature for easier creaming; this helps achieve a light texture. Use a kitchen scale for precise measurements, especially for the flour, to avoid dense cookies. Don’t skip the resting time before transferring the cookies to the wire rack; it helps them maintain their shape. For added flavor, try using high-quality chocolate chips or experiment with flavored extracts. Lastly, keep an eye on the baking time; cookies will continue to cook slightly after being removed from the oven, so take them out when they’re just golden around the edges.
Variations of Hocus Pocus Cookies
Get creative with your hocus pocus cookies by trying out various delicious variations! For a twist, substitute semi-sweet chocolate chips with white chocolate, dark chocolate, or even peanut butter chips for a different flavor profile. If you love nuts, consider adding chopped walnuts or pecans for a delightful crunch. You can also experiment with spices like cinnamon or pumpkin spice to enhance the seasonal vibe. For a fun presentation, try using Halloween-themed sprinkles or colored chocolate candies instead of regular sprinkles. These variations allow you to customize your cookies to suit your taste and make them even more festive!
Storage & Reheating Instructions
To keep your hocus pocus cookies fresh, store them in an airtight container at room temperature. They will stay delicious for up to one week. If you want to extend their shelf life, consider freezing the cookies. Place them in a freezer-safe bag or container, separating layers with parchment paper, and they can last for up to three months. When you’re ready to enjoy them, simply thaw at room temperature or reheat them in the microwave for about 10-15 seconds for a warm, gooey treat. Enjoy your festive cookies anytime!
Nutritional Information
Please note that the nutritional values for these hocus pocus cookies may vary based on specific ingredients and brands used. The following values are approximate per cookie: 150 calories, 10g sugar, 7g fat, and 2g protein. Always check ingredient labels for the most accurate information.
FAQ Section
Can I use different types of chocolate?
Absolutely! You can customize your hocus pocus cookies by using different types of chocolate chips. Consider using dark chocolate for a richer flavor, white chocolate for a sweeter taste, or even butterscotch chips for a unique twist. You can also mix and match different types of chips for an exciting flavor combination!
How do I make these cookies gluten-free?
To make hocus pocus cookies gluten-free, simply substitute the all-purpose flour with a gluten-free flour blend. Make sure the blend contains xanthan gum, which helps mimic the texture of regular flour. Additionally, check that all other ingredients, like the baking soda and chocolate chips, are gluten-free. This way, everyone can enjoy these festive treats!
How long do the cookies last?
When stored in an airtight container at room temperature, your hocus pocus cookies will stay fresh for about one week. If you want them to last longer, you can freeze them for up to three months. Just make sure to separate layers with parchment paper to prevent sticking.
Can I freeze the cookie dough?
Yes! You can freeze the cookie dough before baking. Simply scoop the cookie dough onto a baking sheet lined with parchment paper, freeze until solid, and then transfer the dough balls to a freezer-safe bag or container. When you’re ready to bake, you can bake the frozen dough directly from the freezer; just add a couple of extra minutes to the baking time.
What can I do with leftover sprinkles?
If you have leftover sprinkles after making your hocus pocus cookies, there are plenty of fun uses! You can sprinkle them on top of cupcakes, incorporate them into homemade trail mix, or use them to decorate cakes and other desserts. They can even be added to pancake or waffle batter for a festive breakfast treat!
Print
Hocus Pocus Cookies
- Total Time: 27 minutes
- Yield: 24 cookies 1x
- Diet: Vegetarian
Description
Hocus Pocus cookies are fun and festive treats that are perfect for Halloween celebrations.
Ingredients
- 1 cup unsalted butter, softened
- 1 cup granulated sugar
- 1 cup brown sugar, packed
- 2 large eggs
- 1 teaspoon vanilla extract
- 3 cups all-purpose flour
- 1 teaspoon baking soda
- 1 teaspoon salt
- 2 cups chocolate chips
- 1 cup colorful sprinkles
Instructions
- Preheat your oven to 350°F (175°C).
- In a large bowl, cream together the softened butter, granulated sugar, and brown sugar until smooth.
- Add the eggs and vanilla extract, and mix well.
- In another bowl, whisk together the flour, baking soda, and salt.
- Gradually add the dry ingredients to the wet ingredients, mixing until combined.
- Fold in the chocolate chips and sprinkles.
- Drop spoonfuls of cookie dough onto a baking sheet lined with parchment paper.
- Bake for 10-12 minutes or until the edges are golden.
- Let the cookies cool on the baking sheet for a few minutes before transferring them to a wire rack.
🍴 Top Kitchen Essentials You’ll Love
Notes
- Store cookies in an airtight container.
- You can substitute chocolate chips with white chocolate or peanut butter chips.
- Add more sprinkles for extra color.
- Prep Time: 15 minutes
- Cook Time: 12 minutes
- Category: Dessert
- Method: Baking
- Cuisine: American
Nutrition
- Serving Size: 1 cookie
- Calories: 150
- Sugar: 10g
- Sodium: 100mg
- Fat: 7g
- Saturated Fat: 4g
- Unsaturated Fat: 2g
- Trans Fat: 0g
- Carbohydrates: 20g
- Fiber: 1g
- Protein: 2g
- Cholesterol: 20mg
Keywords: hocus pocus cookies, Halloween cookies, festive cookies