

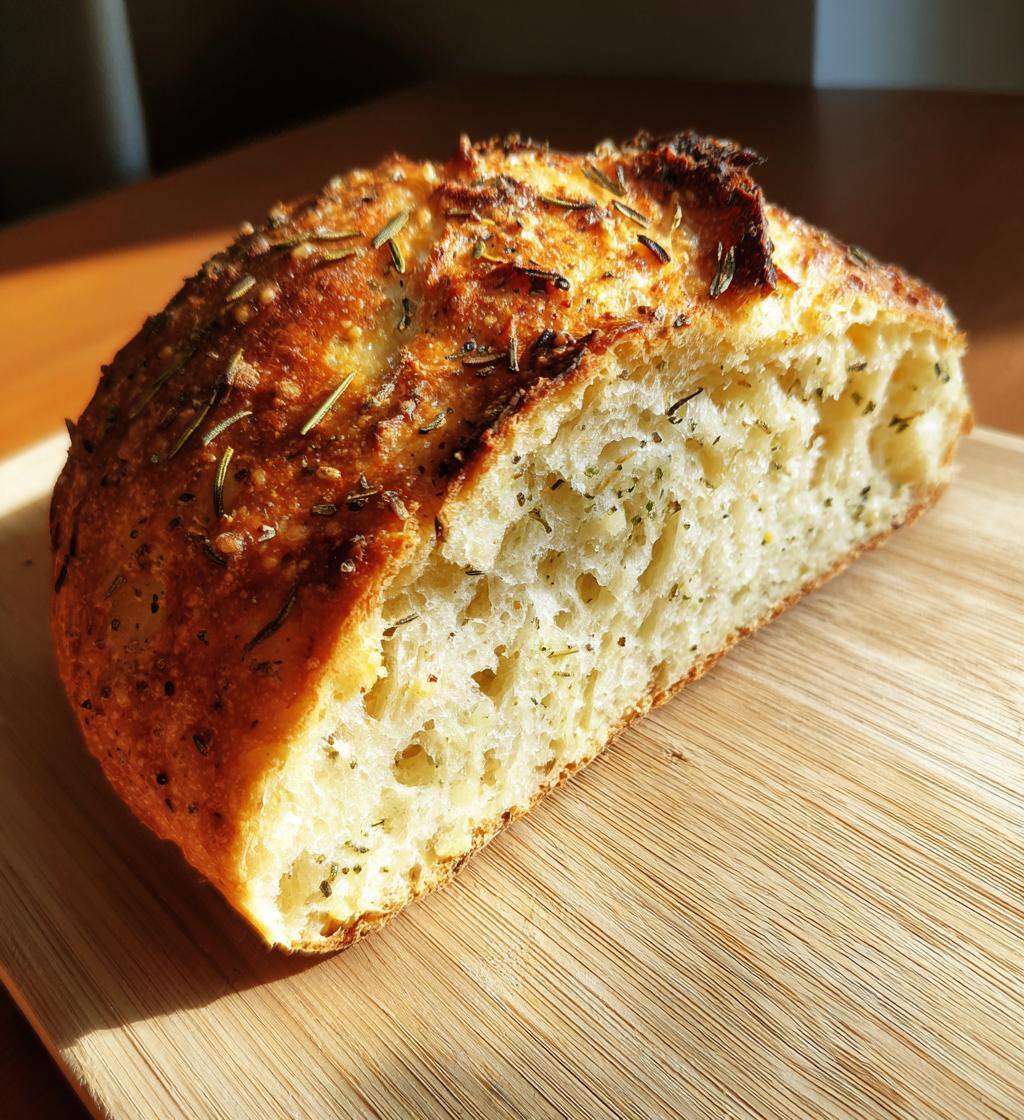
There’s something incredibly satisfying about the aroma that fills your kitchen when baking homemade bread. The process is a delightful blend of science and artistry, and no bread exemplifies this better than Garlic Rosemary Bread. This savory loaf pairs the robust flavor of garlic with the fragrant essence of fresh rosemary, creating a harmonious blend that enchants your senses. As someone who has spent countless afternoons experimenting with bread recipes, I can attest to how this particular combination not only elevates meals but also brings a warm, comforting presence to your home. Whether served alongside a warm soup or enjoyed fresh out of the oven, Garlic Rosemary Bread is sure to become a favorite in your household.
Ingredients for Garlic Rosemary Bread
- 3 cups all-purpose flour
- 1 tablespoon sugar
- 1 teaspoon salt
- 1 packet (2 1/4 teaspoons) active dry yeast
- 1 cup warm water (110°F)
- 1/4 cup olive oil
- 4 cloves garlic, minced
- 2 tablespoons fresh rosemary, chopped
How to Prepare Garlic Rosemary Bread
Step 1: Activate the Yeast
To begin making your Garlic Rosemary Bread, start by activating the yeast. In a medium-sized bowl, combine 1 cup of warm water (approximately 110°F), 1 tablespoon of sugar, and 1 packet (2 1/4 teaspoons) of active dry yeast. Stir gently to dissolve the yeast and sugar, then let the mixture sit for about 5 minutes. You’ll know it’s ready when it becomes frothy and bubbly on the surface. This step is crucial because it ensures that your yeast is alive and will help the bread rise properly.
Step 2: Combine Ingredients
Once the yeast is activated, it’s time to combine the remaining ingredients. In the bowl with the yeast mixture, add 3 cups of all-purpose flour, 1 teaspoon of salt, 1/4 cup of olive oil, 4 cloves of minced garlic, and 2 tablespoons of chopped fresh rosemary. Using a wooden spoon or a spatula, mix the ingredients together until they form a rough dough. Make sure everything is well incorporated before moving on to the next step.
Step 3: Knead the Dough
Now comes the fun part—kneading the dough! Lightly flour a clean surface and transfer your dough onto it. Knead the dough for about 10 minutes, pushing it away from you with the heels of your hands and then folding it back over itself. You want to achieve a smooth and elastic texture. If the dough is sticky, sprinkle a little more flour as needed, but be careful not to add too much. The dough is ready when it springs back after being pressed with your finger.
Step 4: First Rise
After kneading, place your dough in a greased bowl, turning it once to coat the surface lightly with oil. Cover the bowl with a clean kitchen towel or plastic wrap and let it rise in a warm, draft-free area for about 1 hour. The dough should double in size during this time. If you’re unsure where to place it, a warm oven (turned off) or a sunny spot on your countertop works well.
Step 5: Shape the Loaf
Once the dough has risen, it’s time to shape it into a loaf. Begin by gently punching down the dough to release the air. Transfer it back to your floured surface and shape it into a loaf by stretching and folding the dough into a rectangular shape. Tuck the edges underneath to create a smooth top. This step is important as it helps create surface tension, which results in a better rise during baking.
Step 6: Second Rise
Place the shaped loaf into a greased bread pan, making sure it fits snugly. Cover it again with a towel or plastic wrap, and allow it to rise for another 30 minutes. This second rise helps develop the flavor and texture of your Garlic Rosemary Bread, so be patient and let it do its thing!
Step 7: Preheat and Bake
While the dough is rising for the second time, preheat your oven to 375°F (190°C). Once the loaf has finished rising and has puffed up nicely, it’s time to bake! Place the bread in the preheated oven and bake for 25-30 minutes, or until the top is golden brown and sounds hollow when tapped. Keep an eye on it towards the end of baking to prevent over-browning.
Step 8: Cool and Slice
After baking, carefully remove the Garlic Rosemary Bread from the oven and let it cool in the pan for about 5 minutes. Then, transfer it to a wire rack to cool completely before slicing. This cooling period is crucial as it allows the bread to set properly. To store any leftovers, keep the bread in an airtight container at room temperature for up to 3 days. Enjoy your delicious homemade Garlic Rosemary Bread!
Why You’ll Love This Garlic Rosemary Bread
- Flavorful: The combination of garlic and rosemary creates an aromatic and savory bread that elevates any meal.
- Easy to Make: With simple ingredients and straightforward steps, you can enjoy homemade bread without any advanced baking skills.
- Perfect for Meals: This bread pairs beautifully with soups, salads, and pasta dishes, making it a versatile addition to your dining table.
- Great Aroma: Baking Garlic Rosemary Bread fills your home with a mouthwatering scent that is sure to entice everyone.
- Customizable: You can easily adjust the garlic and rosemary levels or add other herbs and spices to suit your taste preferences.
- Fresh and Homemade: There’s nothing quite like enjoying warm, fresh bread straight out of the oven, knowing you made it yourself.
🍴 Top Kitchen Essentials You’ll Love




Tips for Success with Garlic Rosemary Bread
To ensure your Garlic Rosemary Bread turns out perfectly every time, here are some practical tips and tricks to keep in mind:
Adjusting Garlic Levels
If you’re a garlic lover, feel free to increase the amount of minced garlic to enhance the flavor. Conversely, if you prefer a milder taste, reduce the garlic to suit your palate. Experimenting with the amount of garlic can lead to delightful variations of flavor.
Choosing the Right Flour
While all-purpose flour works well, consider using bread flour for a chewier texture. Bread flour has a higher protein content, which can contribute to a better rise and overall structure of your Garlic Rosemary Bread.
Optimal Rising Conditions
For the best results, ensure that the dough rises in a warm, draft-free environment. If your kitchen is cool, you can create a warm atmosphere by preheating your oven to the lowest setting for a few minutes, then turning it off and placing the dough inside. Alternatively, covering the dough with a damp cloth can help maintain humidity and warmth.
Knocking Down the Dough
When punching down the dough after the first rise, do so gently to avoid deflating it too much. This will help maintain the airy structure you’ve created during the rising process, leading to a lighter loaf.
Testing for Doneness
To ensure your Garlic Rosemary Bread is fully baked, tap the bottom of the loaf after removing it from the oven. If it sounds hollow, it’s ready. If not, return it to the oven for a few more minutes. This simple test is a reliable way to check for doneness.
Storing for Freshness
To keep your Garlic Rosemary Bread fresh for longer, store it in an airtight container or wrap it tightly in plastic wrap. Avoid refrigerating the bread, as this can dry it out. Instead, enjoy it within three days or freeze it for longer storage.
Experimenting with Herbs
Don’t hesitate to get creative with your Garlic Rosemary Bread. You can add other herbs like thyme, oregano, or even a sprinkle of Parmesan cheese for an extra flavor kick. Tailoring the recipe to your taste can lead to wonderful new variations!
Nutritional Information
Understanding the nutritional content of your Garlic Rosemary Bread allows you to enjoy it while being mindful of your dietary choices. Below are the typical nutritional values for one slice of this delicious homemade bread:
- Calories: 150
- Fat: 5g
- Saturated Fat: 0.5g
- Trans Fat: 0g
- Cholesterol: 0mg
- Sodium: 200mg
- Total Carbohydrates: 24g
- Dietary Fiber: 1g
- Sugar: 1g
- Protein: 4g
These values are estimates and can vary based on the ingredients used and portion sizes. For a more accurate nutritional breakdown, consider using a nutritional calculator based on the specific brands and amounts of ingredients you use in your Garlic Rosemary Bread.
FAQ About Garlic Rosemary Bread
What If My Garlic Rosemary Bread Doesn’t Turn Out Right?
If your Garlic Rosemary Bread doesn’t rise or has an odd texture, the issue may stem from the yeast. Ensure your yeast is fresh and active by checking the expiration date. If the bread is too dense, it could be due to over-kneading or not enough rising time. For future bakes, follow the instructions closely and pay attention to the dough’s texture and appearance during the process.
Can I Prepare This in Advance?
Yes, you can prepare Garlic Rosemary Bread in advance! You can make the dough and let it rise, then shape it into a loaf and refrigerate it. This slows down the fermentation process. When you’re ready to bake, allow it to come to room temperature and let it rise again before baking. Alternatively, you can bake the bread in advance and store it. Just remember to cool it completely before wrapping and storing it in an airtight container.
What Ingredients Can I Swap?
If you have dietary restrictions or preferences, there are several substitutions you can make in Garlic Rosemary Bread. For a gluten-free version, use a gluten-free all-purpose flour blend. To make it vegan, replace the olive oil with a neutral oil and ensure that your sugar is vegan-friendly. You can also experiment with different herbs, such as thyme or sage, to create unique flavor profiles. Adjusting the garlic level can also cater to your taste preferences.
Serving Suggestions for Garlic Rosemary Bread
Garlic Rosemary Bread is not only a delicious treat on its own, but it also pairs wonderfully with a variety of dishes, enhancing your dining experience. Here are some delightful serving suggestions to consider:
How to Serve Garlic Rosemary Bread
For the best experience, serve your Garlic Rosemary Bread warm. You can slice it into thick pieces or serve it as a whole loaf for guests to tear off their portions. A light brushing of olive oil or a spread of butter can elevate the flavors even more. Consider placing the bread in a basket lined with a cloth to keep it warm and inviting at the dining table.
Perfect Pairings & Toppings
Garlic Rosemary Bread complements many dishes beautifully. Here are some perfect pairings:
- Soups: This bread is an excellent accompaniment to hearty soups like minestrone, tomato basil, or roasted garlic soup. The bread can be used to soak up the flavorful broth.
- Salads: Pair it with fresh salads, especially those with a vinaigrette dressing. A classic Caesar salad or a Mediterranean salad would work particularly well.
- Pasta Dishes: Serve alongside pasta dishes such as spaghetti aglio e olio or fettuccine Alfredo. The garlic and rosemary flavors will harmonize nicely with your meal.
- Cheese Platter: Create a delightful cheese board featuring soft cheeses like brie or goat cheese alongside olives, cured meats, and your Garlic Rosemary Bread. This makes for a great appetizer or snack.
- Dips: Serve with olive oil and balsamic vinegar for dipping. You can also pair it with flavored hummus or a creamy spinach artichoke dip for a delicious starter.
With its aromatic flavors and versatile nature, Garlic Rosemary Bread is sure to enhance any meal, making it a must-have addition to your dining table.
Print
Garlic Rosemary Bread
- Total Time: 1 hour 45 minutes
- Yield: 1 loaf 1x
- Diet: Vegetarian
Description
Garlic Rosemary Bread is a savory and aromatic bread perfect for any meal.
Ingredients
- 3 cups all-purpose flour
- 1 tablespoon sugar
- 1 teaspoon salt
- 1 packet (2 1/4 teaspoons) active dry yeast
- 1 cup warm water (110°F)
- 1/4 cup olive oil
- 4 cloves garlic, minced
- 2 tablespoons fresh rosemary, chopped
Instructions
- In a bowl, combine warm water, sugar, and yeast. Let it sit for 5 minutes until frothy.
- Add flour, salt, olive oil, garlic, and rosemary to the yeast mixture.
- Knead the dough on a floured surface for about 10 minutes.
- Place the dough in a greased bowl and cover. Let it rise in a warm area for 1 hour.
- Punch down the dough and shape it into a loaf.
- Place the loaf in a greased bread pan and let it rise for another 30 minutes.
- Preheat the oven to 375°F (190°C).
- Bake for 25-30 minutes or until golden brown.
- Cool before slicing.
🍴 Top Kitchen Essentials You’ll Love
Notes
- Store in an airtight container for up to 3 days.
- This bread pairs well with soups and salads.
- For a stronger garlic flavor, increase the amount of garlic.
- Prep Time: 15 minutes
- Cook Time: 30 minutes
- Category: Bread
- Method: Baking
- Cuisine: Italian
Nutrition
- Serving Size: 1 slice
- Calories: 150
- Sugar: 1g
- Sodium: 200mg
- Fat: 5g
- Saturated Fat: 0.5g
- Unsaturated Fat: 4g
- Trans Fat: 0g
- Carbohydrates: 24g
- Fiber: 1g
- Protein: 4g
- Cholesterol: 0mg
Keywords: Garlic Rosemary Bread