

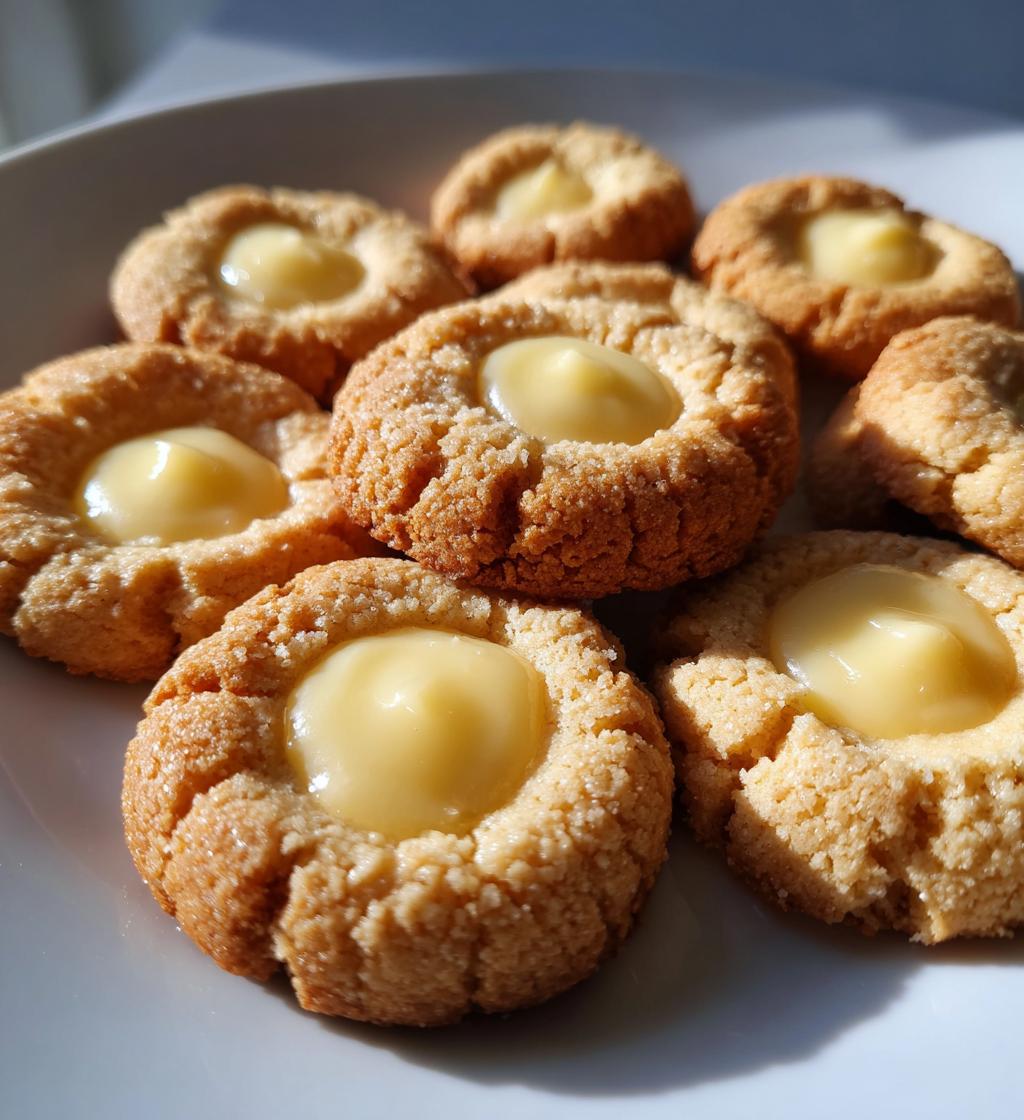
As the holiday season approaches, the aroma of freshly baked cookies fills the air, creating a warm and inviting atmosphere. One treat that perfectly embodies the spirit of the season is Eggnog Thumbprints. These delightful cookies are not just a visual feast; they are a flavorful celebration of the classic holiday beverage we all adore. Imagine tender, buttery cookies infused with the rich, creamy essence of eggnog, beautifully crowned with a sweet eggnog-flavored icing. They make for a charming addition to any festive gathering, whether it’s a holiday party, family gathering, or cozy evening at home.

Eggnog Thumbprints are easy to make, and their unique flavor will have your guests coming back for more. They are the perfect combination of nostalgia and creativity, making them an ideal choice for holiday baking. With just a few simple ingredients, you can whip up a batch of these scrumptious cookies that are sure to spread cheer and joy. So gather your loved ones, roll up your sleeves, and let’s dive into the wonderful world of Eggnog Thumbprints!
Ingredients List
- 1 cup unsalted butter, softened
- 1/2 cup powdered sugar
- 1 1/2 cups all-purpose flour
- 1/2 teaspoon nutmeg
- 1/4 teaspoon salt
- 1/2 teaspoon vanilla extract
- 1/2 cup eggnog
- 1/2 cup additional powdered sugar for icing
How to Prepare Eggnog Thumbprints
Making Eggnog Thumbprints is a delightful and straightforward process that will fill your kitchen with festive aromas. Follow these detailed steps to ensure your cookies turn out perfectly every time!
Step-by-Step Instructions
Preparing the Dough
Start by preheating your oven to 350°F (175°C). In a large mixing bowl, cream together 1 cup of softened unsalted butter and 1/2 cup of powdered sugar until the mixture is light and fluffy. This should take about 2-3 minutes using an electric mixer on medium speed. Be sure not to overmix, as this can affect the texture of the cookies.
Next, sift together 1 1/2 cups of all-purpose flour, 1/2 teaspoon of nutmeg, and 1/4 teaspoon of salt in a separate bowl. Gradually add the dry ingredients to the creamed mixture, mixing until just combined. Finally, incorporate 1/2 teaspoon of vanilla extract and 1/2 cup of eggnog into the dough. Mix until everything is well combined, but take care not to overwork the dough, as this can lead to tough cookies.
Shaping and Baking
Once your dough is ready, use your hands to shape it into small balls, about 1 inch in diameter. Place the dough balls on an ungreased baking sheet, leaving enough space between them as they will spread while baking. Using your thumb, gently press down in the center of each ball to create an indentation. This step is crucial as it will hold the delicious icing later on.
Bake the cookies in your preheated oven for 15-20 minutes, or until they are lightly golden around the edges. Keep a close eye on them during the last few minutes of baking to avoid overcooking. Once done, remove the baking sheet from the oven and allow the cookies to cool on the sheet for about 5 minutes before transferring them to a wire rack to cool completely. This helps them firm up and makes them easier to handle.
Icing the Cookies
After the cookies have cooled, it’s time to fill the thumbprint centers with icing. For the icing, mix 1/2 cup of powdered sugar with a few tablespoons of eggnog until you reach your desired consistency. The icing should be thick enough to hold its shape but still pourable. If it’s too thin, add more powdered sugar; if it’s too thick, add a little more eggnog.
Using a piping bag or a small spoon, carefully fill each thumbprint with the eggnog icing. For an additional festive touch, consider sprinkling a pinch of nutmeg on top of the icing or drizzling with melted chocolate. Allow the icing to set before serving, and enjoy your delicious Eggnog Thumbprints with family and friends!
Why You’ll Love This Recipe
- Festive Flavor: Eggnog Thumbprints capture the essence of the holiday season with their rich eggnog flavor and warm spices.
- Easy to Make: With simple ingredients and straightforward steps, these cookies are perfect for bakers of all skill levels.
- Perfect for Sharing: Ideal for holiday gatherings, these cookies are a hit with family and friends, making them great for sharing.
- Customizable: You can easily adjust the flavors or add toppings to make them your own, such as adding chocolate or nuts.
- Beautiful Presentation: The thumbprint design and icing make these cookies visually appealing and festive.
- Make Ahead: These cookies can be prepared in advance, allowing you to plan your holiday baking with ease.
🍴 Top Kitchen Essentials You’ll Love




Tips for Success
To ensure your Eggnog Thumbprints turn out perfectly every time, here are some pro tips to enhance their flavor and texture:
- Use Quality Ingredients: The flavor of your cookies will significantly depend on the quality of the ingredients. Opt for high-quality unsalted butter and fresh eggnog to ensure the best taste.
- Chill the Dough: If you find the dough too soft to handle, consider chilling it in the refrigerator for about 30 minutes. This will make it easier to shape into balls and maintain their form while baking.
- Don’t Overmix: When combining the wet and dry ingredients, mix until just combined. Overmixing can lead to tough cookies, so be gentle during this step.
- Monitor Baking Time: Every oven is different, so keep an eye on your cookies during the last few minutes of baking. They should be lightly golden at the edges but still soft in the center.
- Add Extra Spice: For a more pronounced flavor, consider increasing the nutmeg slightly in the dough. This will enhance the eggnog taste and give your cookies a festive kick.
- Experiment with Icing: If you want to add a twist to the icing, try mixing in a splash of rum extract or using a flavored eggnog for a unique taste.
- Garnish Creatively: For added visual appeal, sprinkle chopped nuts, chocolate shavings, or a dusting of cinnamon on top of the icing before it sets.
Nutritional Information Section
Here’s the estimated nutritional information for each Eggnog Thumbprint cookie:
- Calories: 120
- Fat: 7g
- Saturated Fat: 4g
- Unsaturated Fat: 2g
- Trans Fat: 0g
- Cholesterol: 30mg
- Sodium: 50mg
- Carbohydrates: 14g
- Fiber: 0g
- Sugar: 5g
- Protein: 1g
Please note that these values are estimates and may vary based on ingredient brands and preparation methods. For the most accurate nutritional information, consider using a recipe calculator with your specific ingredients.
FAQ Section
What If My Eggnog Thumbprints Don’t Turn Out Right?
If your Eggnog Thumbprints don’t turn out as expected, don’t be discouraged! Common issues include cookies being too dry or crumbly, which may result from overmixing the dough or using too much flour. If they spread too much during baking, ensure your dough is sufficiently chilled before shaping. For those who find their cookies too soft, try adjusting the baking time slightly or chilling the dough longer next time.
Can I Prepare Eggnog Thumbprints in Advance?
Absolutely! You can prepare Eggnog Thumbprints in advance, making them a convenient option for holiday baking. You can either prepare the dough and refrigerate it for up to 48 hours before baking or bake the cookies and store them in an airtight container for up to a week. Just remember to fill them with icing closer to the time of serving for the best flavor and freshness.
What Ingredients Can I Swap in Eggnog Thumbprints?
If you need to make substitutions, there are several options for Eggnog Thumbprints. For a dairy-free version, use vegan butter and plant-based eggnog. If you want to reduce sugar, you can use a sugar substitute like erythritol or stevia. Additionally, you can swap out all-purpose flour for gluten-free flour blends to cater to gluten sensitivities. Always ensure that any substitutions align with your dietary needs for the best results.
Can I Freeze Eggnog Thumbprints?
Yes, you can freeze Eggnog Thumbprints! To freeze, place the baked cookies in a single layer on a baking sheet and freeze until solid. Once frozen, transfer them to a freezer-safe bag or container. They can be stored in the freezer for up to three months. When you’re ready to enjoy them, thaw the cookies at room temperature and ice them before serving.
How Can I Enhance the Flavor of Eggnog Thumbprints?
To enhance the flavor of your Eggnog Thumbprints, consider adding spices like cinnamon or cloves to the dough for an extra layer of warmth. You can also experiment with flavored extracts, such as rum or almond, to complement the eggnog. Drizzling melted chocolate over the icing or adding a sprinkle of nutmeg on top can elevate their festive appeal even further!
Storage & Reheating Instructions
To keep your Eggnog Thumbprints fresh and delicious, proper storage is essential. Follow these guidelines to ensure your cookies maintain their flavor and texture.
Best Storage Methods
Once your Eggnog Thumbprints have cooled completely, store them in an airtight container to prevent them from becoming stale. A cookie jar or a plastic container with a tight-fitting lid works well. To keep the cookies from sticking together, you can place a piece of parchment paper between layers of cookies. Ideally, store them at room temperature in a cool, dry place, away from direct sunlight. When stored this way, the cookies will stay fresh for up to one week.
Reheating or Freezing Tips
If you want to enjoy your Eggnog Thumbprints warm, you can reheat them in the microwave. Place a cookie on a microwave-safe plate and heat for about 10-15 seconds, just until warmed through. Be cautious not to overheat them, as this can make the cookies tough.
If you want to store your Eggnog Thumbprints for a longer period, freezing is an excellent option. To freeze, arrange the cooled cookies in a single layer on a baking sheet and freeze them until solid. Then, transfer the cookies to a freezer-safe bag or container, separating layers with parchment paper if necessary. Properly stored, they can last for up to three months in the freezer. When you’re ready to enjoy them, simply thaw the cookies at room temperature and ice them before serving.
Print
Eggnog Thumbprints
- Total Time: 40 minutes
- Yield: 24 cookies 1x
- Diet: Vegetarian
Description
Eggnog Thumbprints are festive cookies filled with a rich eggnog-flavored icing. They are perfect for holiday gatherings.
Ingredients
- 1 cup unsalted butter, softened
- 1/2 cup powdered sugar
- 1 1/2 cups all-purpose flour
- 1/2 teaspoon nutmeg
- 1/4 teaspoon salt
- 1/2 teaspoon vanilla extract
- 1/2 cup eggnog
- 1/2 cup additional powdered sugar for icing
Instructions
- Preheat your oven to 350°F (175°C).
- In a bowl, cream the butter and powdered sugar together.
- Add the flour, nutmeg, salt, vanilla, and eggnog. Mix until combined.
- Shape the dough into small balls and place them on a baking sheet.
- Make an indentation in the center of each ball using your thumb.
- Bake for 15-20 minutes until lightly golden.
- Let the cookies cool, then fill the centers with eggnog icing.
🍴 Top Kitchen Essentials You’ll Love
Notes
- Store cookies in an airtight container.
- For a stronger flavor, add more nutmeg to the dough.
- Use store-bought eggnog or make your own for the filling.
- Prep Time: 20 minutes
- Cook Time: 20 minutes
- Category: Dessert
- Method: Baking
- Cuisine: American
Nutrition
- Serving Size: 1 cookie
- Calories: 120
- Sugar: 5g
- Sodium: 50mg
- Fat: 7g
- Saturated Fat: 4g
- Unsaturated Fat: 2g
- Trans Fat: 0g
- Carbohydrates: 14g
- Fiber: 0g
- Protein: 1g
- Cholesterol: 30mg
Keywords: Eggnog Thumbprints, holiday cookies, festive dessert