

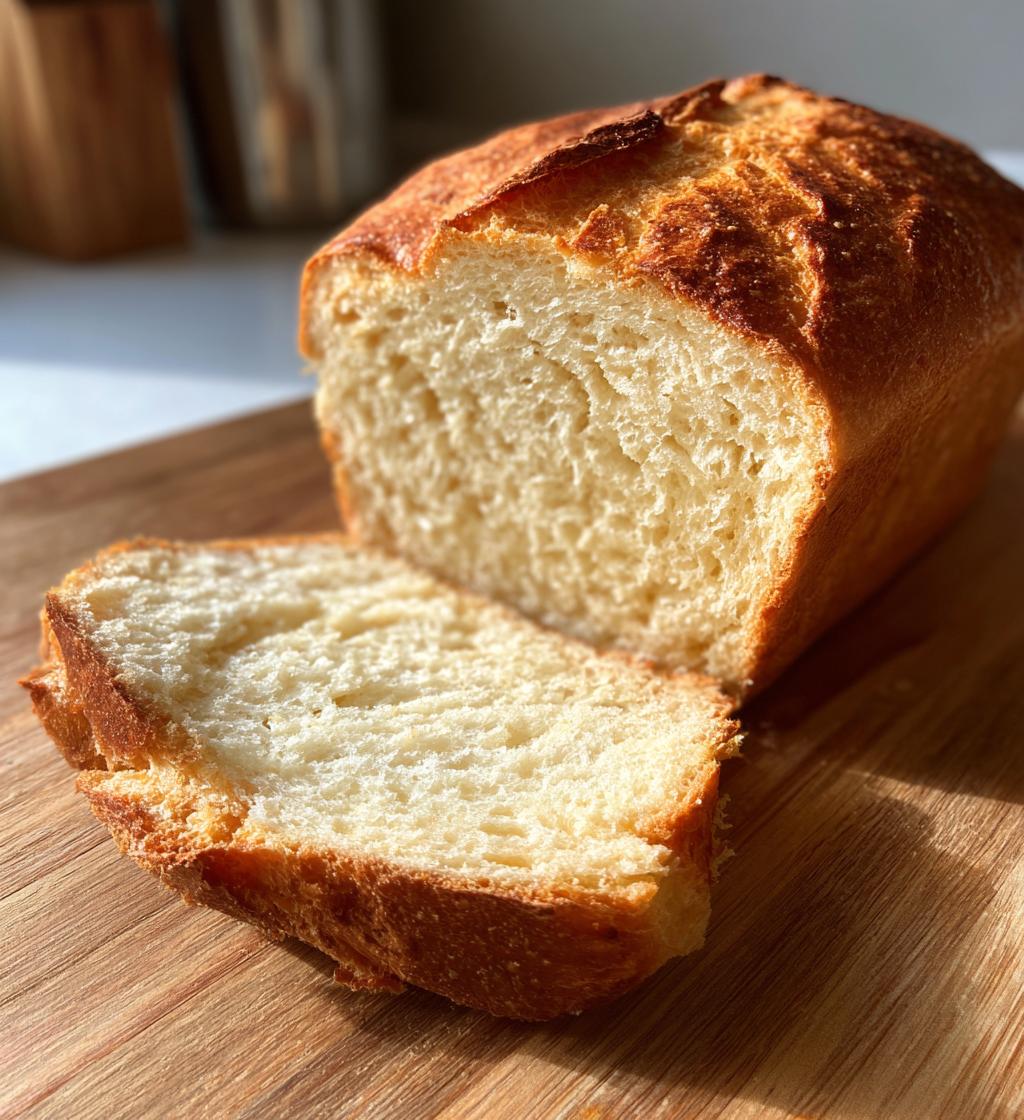
Amish Milk Bread is not just a recipe; it’s a slice of comfort that brings warmth and joy to your kitchen. With its irresistibly soft texture and slightly sweet flavor, this bread is perfect for everything from morning toast to hearty sandwiches. The process of making homemade bread is not only satisfying but also allows you to control the ingredients, resulting in a healthier and tastier option compared to store-bought varieties. Imagine the aroma of freshly baked bread wafting through your home, inviting everyone to gather around the table. Whether you’re slathering it with butter or using it as the base for a delicious sandwich, Amish Milk Bread is sure to become a staple in your household. Join me as we explore how to create this delightful bread that embodies the essence of wholesome, homemade goodness.

Ingredients List
To create the delightful Amish Milk Bread, you’ll need the following ingredients. Each ingredient plays a vital role in achieving the soft, slightly sweet loaf that this recipe promises.
- 4 cups all-purpose flour: This forms the backbone of the bread, providing structure and texture.
- 1 cup milk: Adds moisture and richness, contributing to the soft texture of the bread.
- 1/4 cup sugar: A touch of sweetness that enhances the flavor and helps with browning.
- 1/4 cup butter: Brings a rich flavor and tender crumb to the loaf.
- 2 teaspoons active dry yeast: The leavening agent that helps the bread rise and become fluffy.
- 1 teaspoon salt: Balances the sweetness and enhances all the flavors in the bread.
- 1 large egg: Provides structure and moisture, enriching the dough.
How to Prepare Amish Milk Bread
Making Amish Milk Bread is a straightforward yet rewarding process that yields a deliciously soft loaf perfect for various uses. Follow these step-by-step instructions to ensure your bread turns out perfectly every time.
Step-by-Step Instructions
- Warm the Milk and Butter: Begin by heating 1 cup of milk and 1/4 cup of butter in a small saucepan over low heat. You want the mixture to be warm, not boiling. Once warm, remove it from heat and stir in 1/4 cup of sugar and 2 teaspoons of active dry yeast. Allow this mixture to sit for 10 minutes until it becomes frothy. This step is crucial as it activates the yeast.
- Combine Dry Ingredients: In a large mixing bowl, combine 4 cups of all-purpose flour and 1 teaspoon of salt. Mix the dry ingredients together well to ensure even distribution of the salt.
- Mix the Dough: After the yeast mixture is frothy, add it to the bowl of dry ingredients along with 1 large egg. Stir until a shaggy dough forms. It may be sticky, but that’s okay; just ensure all the flour is incorporated.
- Knead the Dough: Transfer the dough to a floured surface and knead it for 8-10 minutes. You want to develop the gluten, which will give the bread its structure. The dough should become smooth and elastic. If it’s too sticky, sprinkle a little more flour as needed.
- First Rise: Place the kneaded dough in a greased bowl, covering it with a clean kitchen towel or plastic wrap. Let it rise in a warm place for about 1 hour or until it has doubled in size. This rising time is essential for developing the bread’s flavor and texture.
- Punch Down and Shape: Once the dough has risen, gently punch it down to release the air. Shape the dough into a loaf by flattening it slightly, folding the edges towards the center, and rolling it tightly. Place the shaped loaf into a greased loaf pan.
- Second Rise: Cover the loaf again and let it rise for another 30 minutes. This second rise allows the dough to expand further, ensuring a light and fluffy texture.
- Bake the Bread: Preheat your oven to 350°F (175°C). Once the dough has risen again, place the loaf in the preheated oven and bake for 30-35 minutes or until the top is golden brown and the bread sounds hollow when tapped. An internal temperature of 190°F (88°C) indicates it’s fully baked.
- Cool Before Slicing: After baking, remove the bread from the oven and allow it to cool in the pan for about 10 minutes. Then, transfer it to a wire rack to cool completely. This step is important as it helps maintain the bread’s moisture and texture.
Now that you’ve mastered the steps to prepare Amish Milk Bread, you can enjoy it fresh or use it for sandwiches, toast, or even as a side for your favorite meals!
Why You’ll Love This Recipe
- Soft Texture: Amish Milk Bread boasts a wonderfully soft and tender crumb, making each slice a delight to enjoy.
- Slightly Sweet Flavor: The hint of sweetness from the sugar perfectly complements both savory and sweet toppings, making it versatile for any meal.
- Easy to Prepare: With straightforward steps and common ingredients, this homemade bread is accessible for bakers of all skill levels.
- Versatile Uses: Whether you’re making sandwiches, toast, or enjoying it plain, Amish Milk Bread fits seamlessly into any meal or occasion.
- Healthier Alternative: Homemade bread allows you to control the ingredients, ensuring that you avoid preservatives and artificial additives found in store-bought bread.
🍴 Top Kitchen Essentials You’ll Love




Tips for Success
To achieve the perfect loaf of Amish Milk Bread, consider the following pro tips that will elevate your baking game and ensure delicious results every time.
Nailing the Kneading Technique
Kneading is a crucial step in developing the gluten structure of the bread. When kneading, use the heel of your hand to push the dough away from you, then fold it back over itself. Rotate the dough a quarter turn and repeat. Knead for 8-10 minutes until the dough is smooth and elastic. If the dough is too sticky, sprinkle a little more flour, but avoid adding too much, as it can make the bread dense.
Creating the Ideal Rising Environment
For the best rise, place your dough in a warm, draft-free area. If your kitchen is cool, you can preheat your oven to the lowest setting for a few minutes, then turn it off and place the dough inside, covered with a towel. The gentle warmth will help the yeast activate and encourage a good rise. Be patient and allow the dough to double in size; this is key for a light and fluffy loaf.
Checking for Doneness
To know when your Amish Milk Bread is properly baked, look for a golden-brown crust and an internal temperature of 190°F (88°C). You can also test by tapping the bottom of the loaf; if it sounds hollow, it’s done. If you’re unsure, use an instant-read thermometer for accuracy. Remember that underbaking can lead to a gummy texture, while overbaking can dry it out.
Cooling for Best Texture
After baking, allow the bread to cool in the pan for about 10 minutes before transferring it to a wire rack. This step is essential as it prevents the bottom from becoming soggy. Let the bread cool completely before slicing to maintain its moisture and prevent it from tearing. Enjoying it warm is tempting, but patience here will yield a better texture!
By following these tips, you’ll be well on your way to creating a beautifully soft and delicious Amish Milk Bread that your family and friends will love.
Storage & Reheating Instructions
To keep your homemade Amish Milk Bread fresh and delicious, proper storage is essential. Follow these guidelines to ensure your bread retains its soft texture and flavor for as long as possible.
Best Storage Methods
Once your Amish Milk Bread has cooled completely, wrap it tightly in plastic wrap or aluminum foil. This will help prevent air exposure, which can lead to drying out. For longer storage, place the wrapped bread in an airtight container or a resealable plastic bag. Store it at room temperature for up to 3-4 days. If you live in a particularly humid or hot environment, consider refrigerating it to prolong freshness, but do note that refrigeration can sometimes alter the bread’s texture.
Reheating Tips
If you have leftover Amish Milk Bread and want to enjoy it warm again, there are a few methods to consider:
- Oven Method: Preheat your oven to 350°F (175°C). Wrap the bread in aluminum foil to prevent it from drying out and place it in the oven for about 10-15 minutes, or until heated through.
- Toaster Method: For individual slices, you can use a toaster. Simply toast the slices until golden brown and warm. This method adds a delightful crunch to the outside while keeping the inside soft.
- Microwave Method: If you’re in a hurry, place a slice of bread on a microwave-safe plate and cover it with a damp paper towel. Microwave on low power for about 10-15 seconds. Be cautious, as microwaving for too long can make the bread rubbery.
By following these storage and reheating instructions, you can enjoy the delightful taste of Amish Milk Bread long after it’s been freshly baked!
Nutritional Information Section
Understanding the nutritional value of your homemade Amish Milk Bread can help you make informed choices as you enjoy this delightful treat. Below are the estimated nutritional values per slice:
- Calories: 150
- Total Fat: 5g
- Saturated Fat: 3g
- Trans Fat: 0g
- Cholesterol: 20mg
- Sodium: 150mg
- Total Carbohydrates: 24g
- Dietary Fiber: 1g
- Total Sugars: 3g
- Protein: 4g
These values may vary based on specific ingredients used and portion sizes. Enjoy your Amish Milk Bread as part of a balanced diet!
FAQ Section
What If My Amish Milk Bread Doesn’t Turn Out Right?
If your Amish Milk Bread doesn’t rise properly or has an undesirable texture, don’t be discouraged! Common issues include using expired yeast, not allowing enough rising time, or over-kneading the dough. Ensure your yeast is fresh and active by checking the expiration date. If your dough doesn’t rise, try placing it in a warmer environment. If the texture is dense, consider adjusting the amount of flour next time, as too much can make the bread heavy.
Can I Prepare This in Advance?
Yes, you can prepare Amish Milk Bread in advance! The dough can be made and allowed to rise, then shaped and stored in the fridge for up to 24 hours before baking. Alternatively, you can bake the bread ahead of time, let it cool completely, and store it properly. For longer storage, consider freezing the baked loaf. Just ensure it’s well-wrapped to prevent freezer burn.
What Ingredients Can I Swap?
There are several ingredient substitutions you can make for Amish Milk Bread. If you’re lactose intolerant, you can use almond milk or oat milk in place of regular milk. For a dairy-free version, substitute the butter with coconut oil or a vegan butter alternative. You can also replace the all-purpose flour with a gluten-free blend, but this may require adjustments to maintain the bread’s texture.
How Can I Make Amish Milk Bread More Flavorful?
To enhance the flavor of your Amish Milk Bread, consider adding herbs, spices, or even nuts. A teaspoon of garlic powder or dried herbs can bring a savory twist, while cinnamon or nutmeg can add warmth for a sweeter loaf. You can also fold in chocolate chips or dried fruits for a delicious variation.
How Long Does Amish Milk Bread Last?
When stored properly, Amish Milk Bread can last for about 3-4 days at room temperature. If you want it to last longer, consider freezing it. Wrapped tightly, it can be stored in the freezer for up to 3 months. Just remember to thaw it at room temperature or heat it in the oven for the best texture.
Call to Action
We hope you’ve enjoyed learning how to make delicious Amish Milk Bread! If you try this recipe, we would love to hear from you. Please leave a comment below with your thoughts, tips, or any variations you’ve tried. Did you find it easy to make? How did it turn out? Sharing your experiences not only helps us but also inspires fellow bakers in our community. Don’t forget to rate the recipe and share it with your friends and family who might be looking for a delightful homemade bread option. Happy baking!
Print
Amish Milk Bread
- Total Time: 1 hour 50 minutes
- Yield: 1 loaf 1x
- Diet: Vegetarian
Description
Amish Milk Bread is a soft, slightly sweet bread made with milk, sugar, and butter, perfect for sandwiches or toast.
Ingredients
- 4 cups all-purpose flour
- 1 cup milk
- 1/4 cup sugar
- 1/4 cup butter
- 2 teaspoons active dry yeast
- 1 teaspoon salt
- 1 large egg
Instructions
- In a small saucepan, heat milk and butter until warm. Remove from heat and stir in sugar and yeast. Let sit for 10 minutes.
- In a large bowl, combine flour and salt.
- Add the milk mixture and egg to the flour. Mix until a dough forms.
- Knead the dough on a floured surface for 8-10 minutes.
- Place the dough in a greased bowl, cover, and let rise for 1 hour or until doubled in size.
- Punch down the dough and shape it into a loaf. Place in a greased loaf pan.
- Cover and let rise for another 30 minutes.
- Bake in a preheated oven at 350°F for 30-35 minutes.
- Cool on a wire rack before slicing.
🍴 Top Kitchen Essentials You’ll Love
Notes
- Store bread in an airtight container for freshness.
- You can add herbs or spices for extra flavor.
- This bread can be frozen for later use.
- Prep Time: 15 minutes
- Cook Time: 35 minutes
- Category: Bread
- Method: Baking
- Cuisine: American
Nutrition
- Serving Size: 1 slice
- Calories: 150
- Sugar: 3g
- Sodium: 150mg
- Fat: 5g
- Saturated Fat: 3g
- Unsaturated Fat: 1g
- Trans Fat: 0g
- Carbohydrates: 24g
- Fiber: 1g
- Protein: 4g
- Cholesterol: 20mg
Keywords: Amish Milk Bread, homemade bread, soft bread